Salik Management
Fleet Master enables efficient management of salik transactions, vehicle details, and payment status updates, ensuring smooth financial workflows for toll collections.
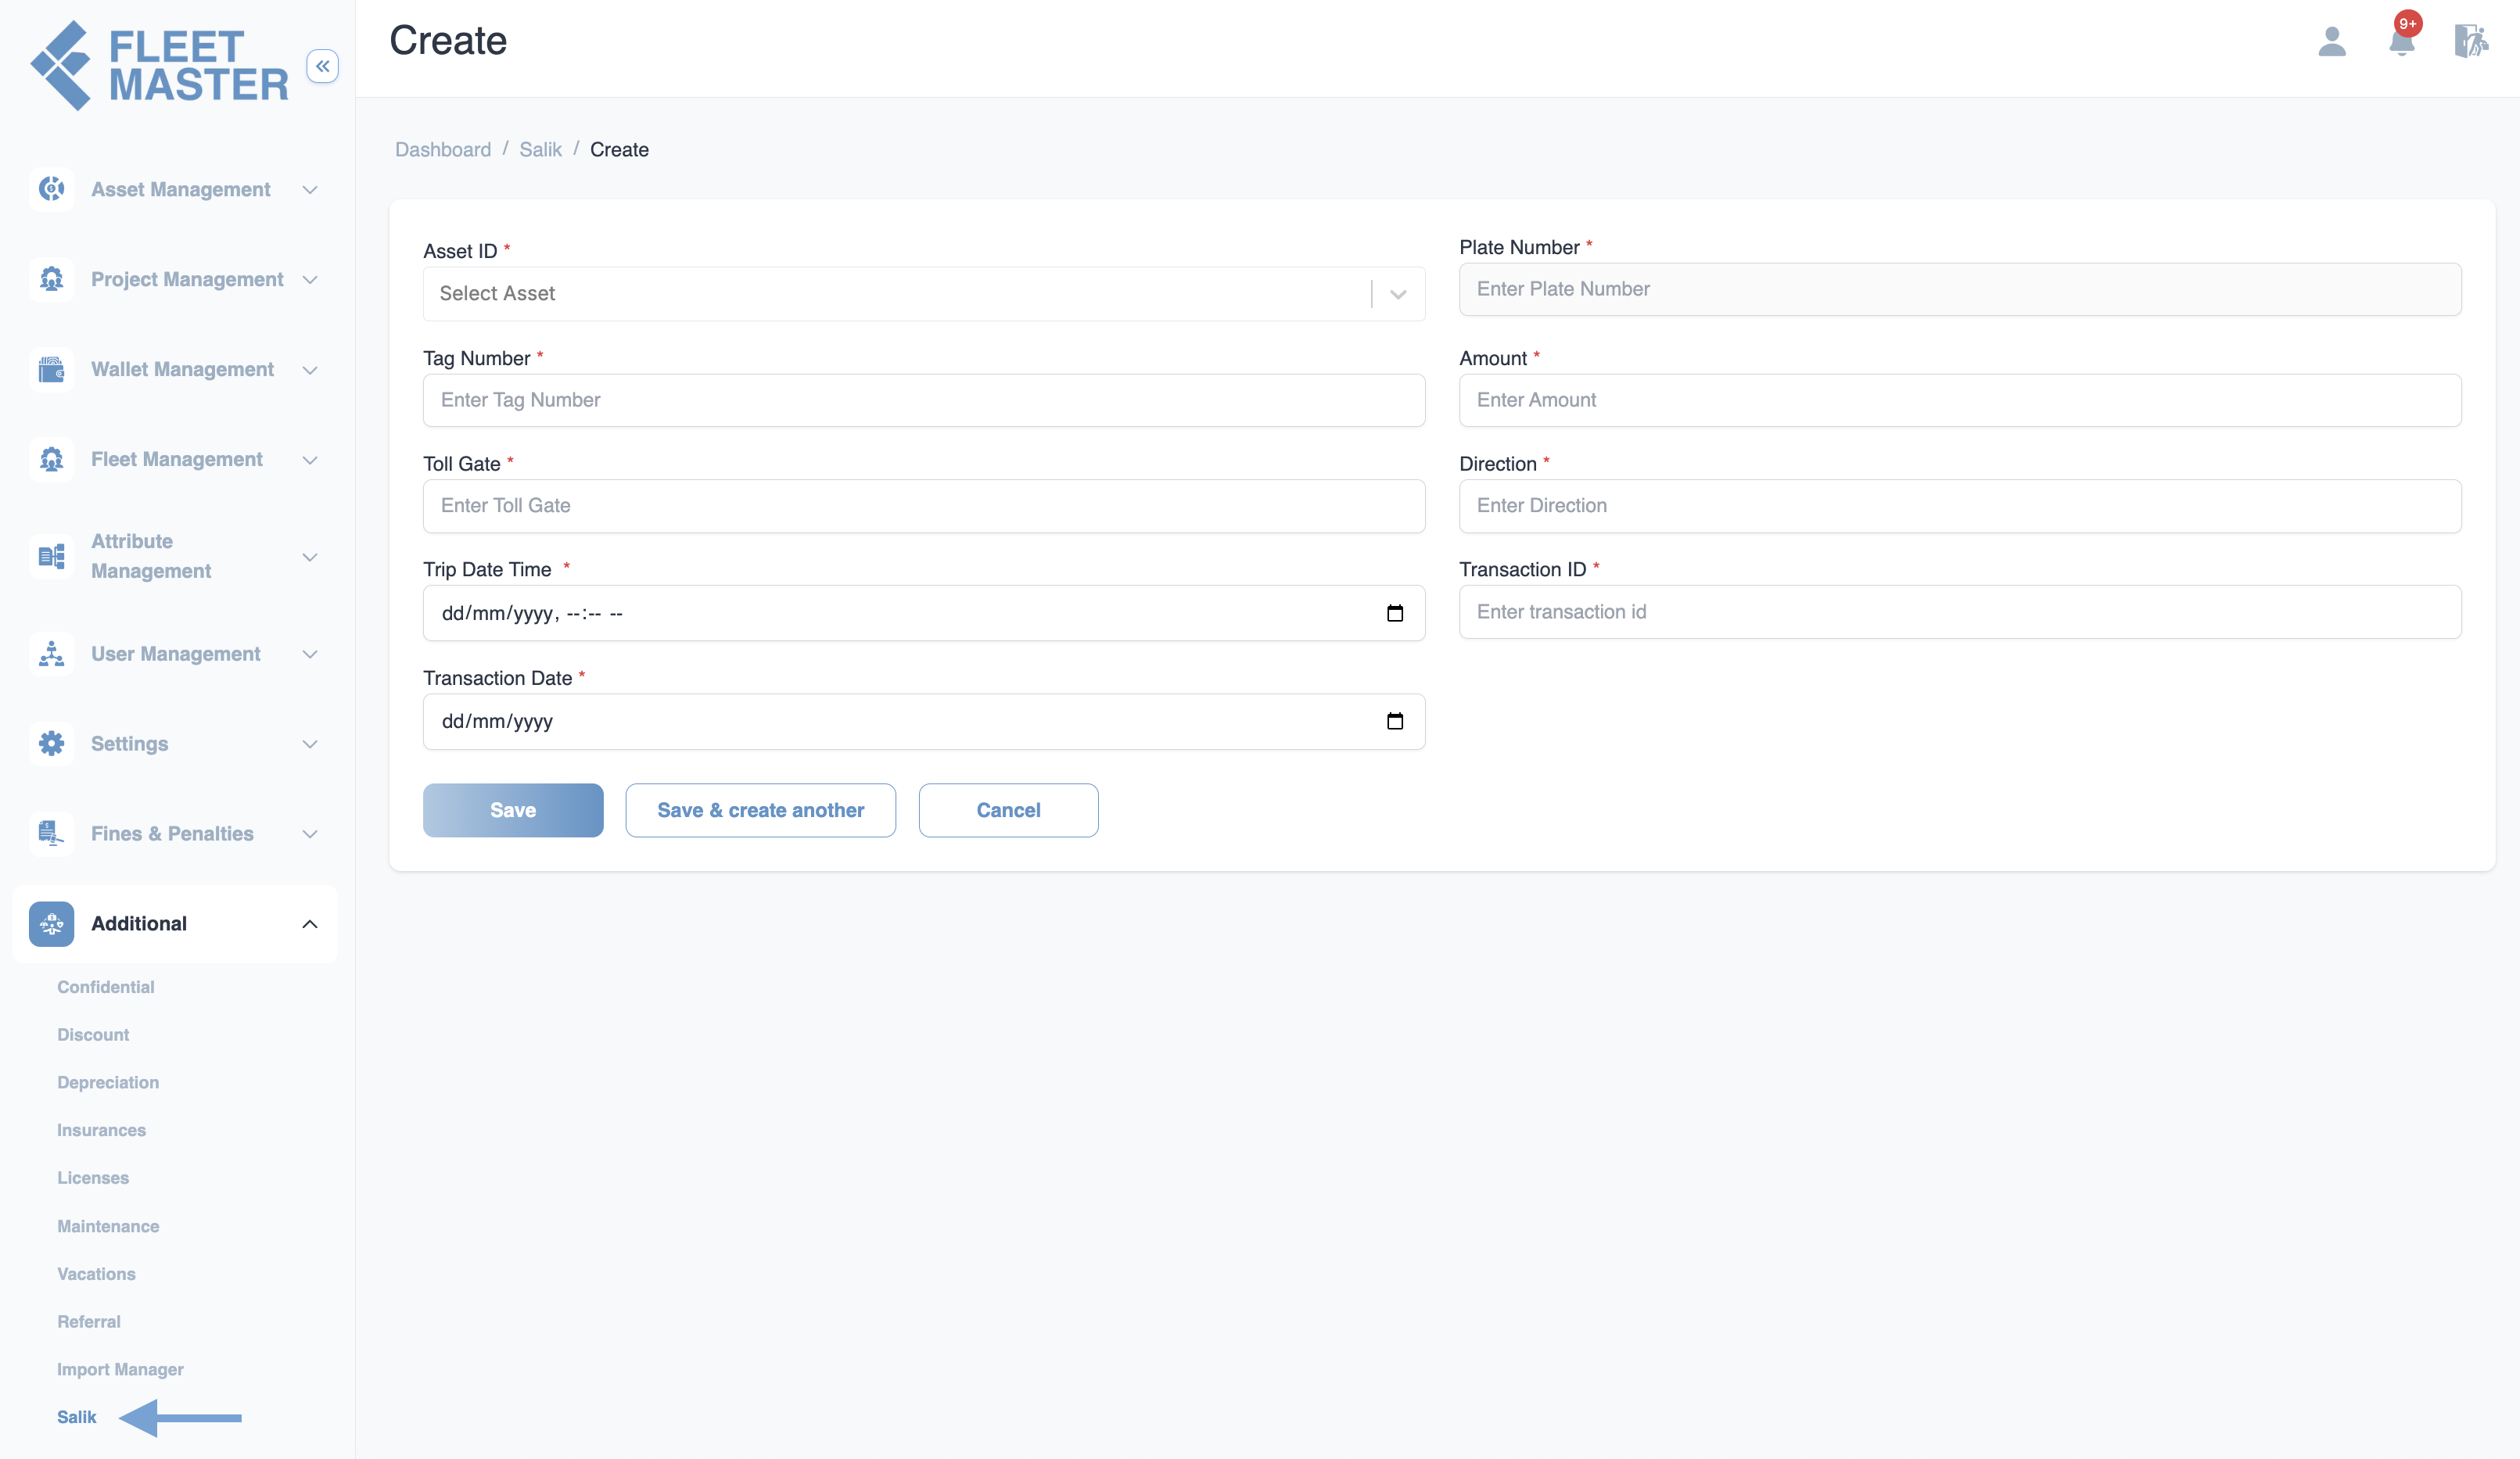
Fleet Master offers an intuitive interface for managing Salik toll transactions, from creating new records to reviewing and confirming payment statuses. To access this feature, navigate to the Salik section from the sidebar.
Salik Overview
In the Salik section, you can manage the following key information for each transaction:
- Asset ID: The unique identifier for the asset.
- Tag Number: The identification number for the vehicle.
- Toll Gate: The specific toll gate used during the transaction.
- Trip Date & Time: The date and time of the vehicle trip.
- Transaction Date: The date the transaction is logged.
- Plate Number: The plate number of the vehicle involved in the transaction.
- Amount: The toll fee amount.
- Direction: The direction of travel (e.g., Abu Dhabi, Dubai).
- Transaction ID: Unique identifier for each transaction.
Creating a New Salik Transaction
To create a new Salik transaction, click on the Create button in the Salik section. Enter the necessary details such as asset ID, tag number, toll gate, amount, direction, and transaction date.
- Asset ID: Select the asset from the list.
- Tag Number: Enter the tag number for the vehicle.
- Toll Gate: Specify the toll gate.
- Amount: Enter the toll fee amount.
- Direction: Enter the direction of travel.
- Plate Number: Enter the vehicle plate number.
- Trip Date & Time: Enter the trip date and time.
- Transaction Date: Specify the date the transaction was logged.
- Transaction ID: Enter the transaction ID.
Once all the information is filled, click Save to create the transaction. If you'd like to create another transaction after saving, click Save & create another.

Finance
View and manage all Salik transactions, including payment status updates and more.
Paying Salik
Once a Salik transaction is ready for payment, Fleet Master enables a seamless process to complete the payment. Follow these steps to pay a Salik toll:
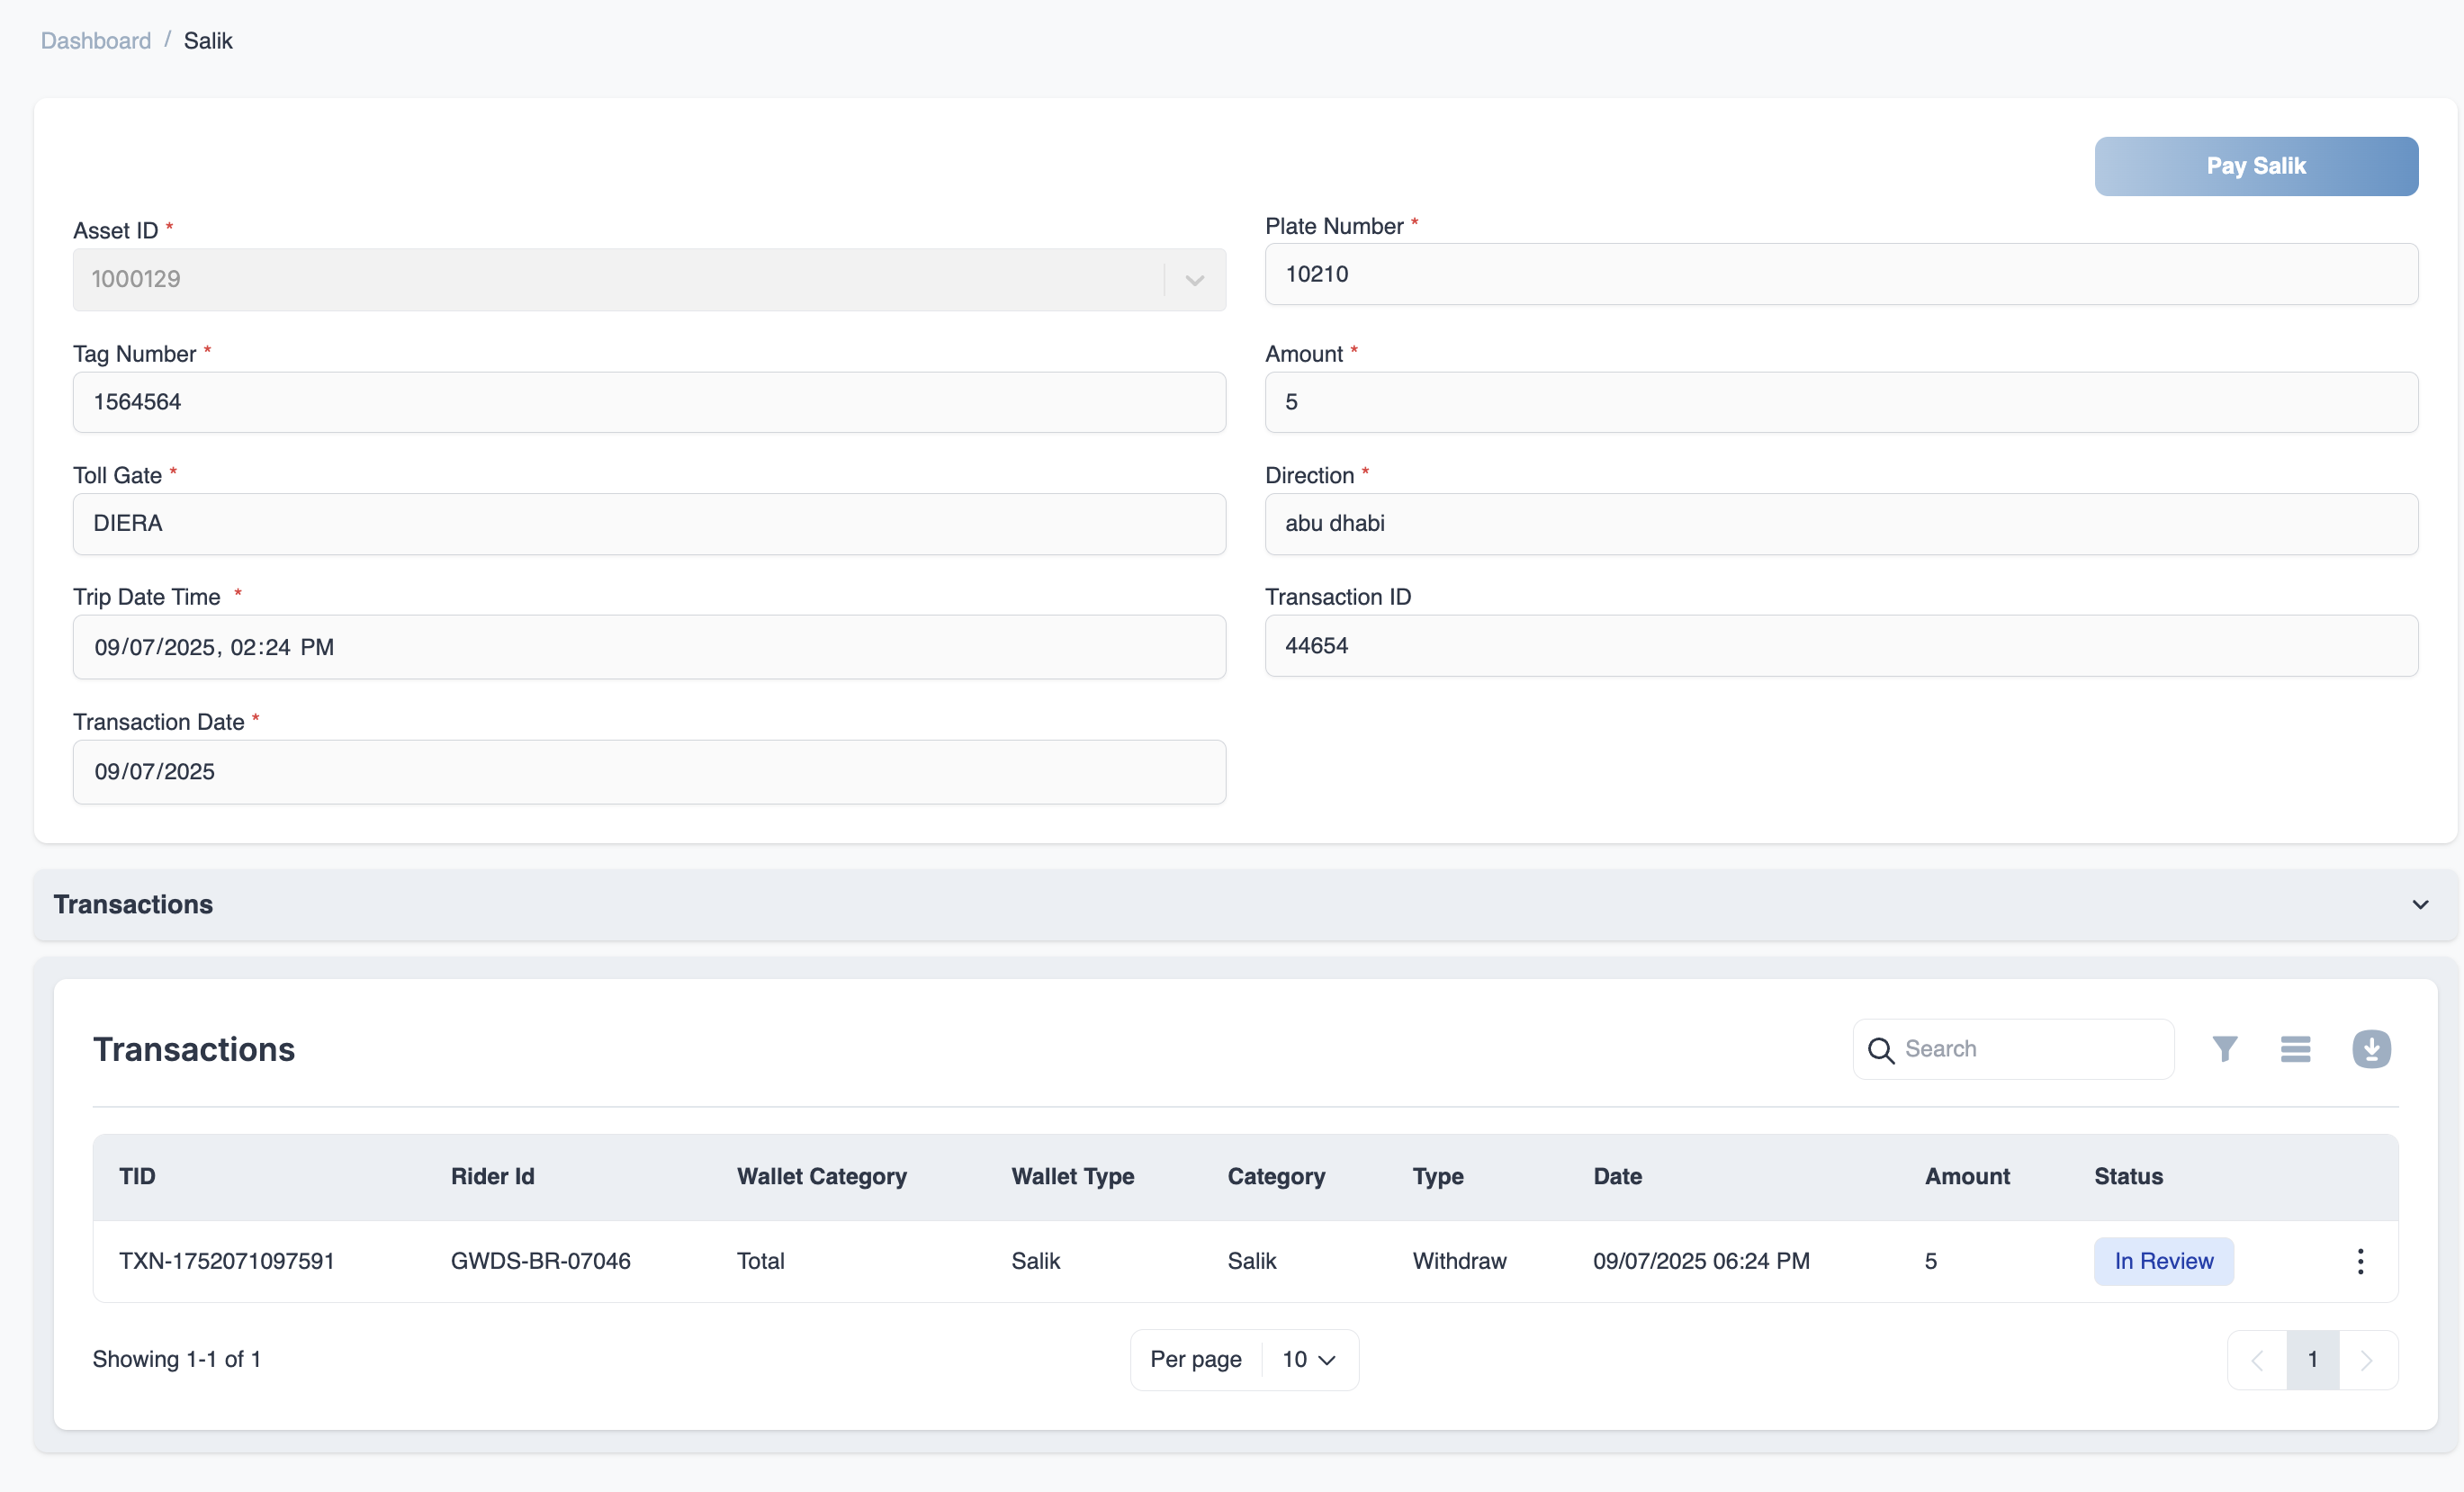
- Navigate to the Salik Details: Click on the Salik transaction that is ready for payment.
- Review Transaction: Ensure all details are correct, such as the amount, plate number, and toll gate.
- Click on "Pay Salik": If the transaction is ready to be processed, click the Pay Salik button.
- Confirm Payment: A confirmation prompt will appear, verifying the payment details. Confirm the payment to proceed.
- Transaction Update: Once the payment is confirmed, the status of the Salik transaction will be updated to Completed.

Best Practices for Salik Management
Regular Transaction Reviews
- Transaction Status: Regularly review Salik transactions to ensure timely updates on status (e.g., pending, in review, or completed).
- Audit Trails: Maintain a clear record of all transactions for accountability and transparency.
Salik Transaction Approval Workflow
- In Review: Transactions should be reviewed by administrators before final confirmation.
- Confirmation Process: Ensure all Salik transactions are confirmed with proper documentation before processing.