Attachment Types
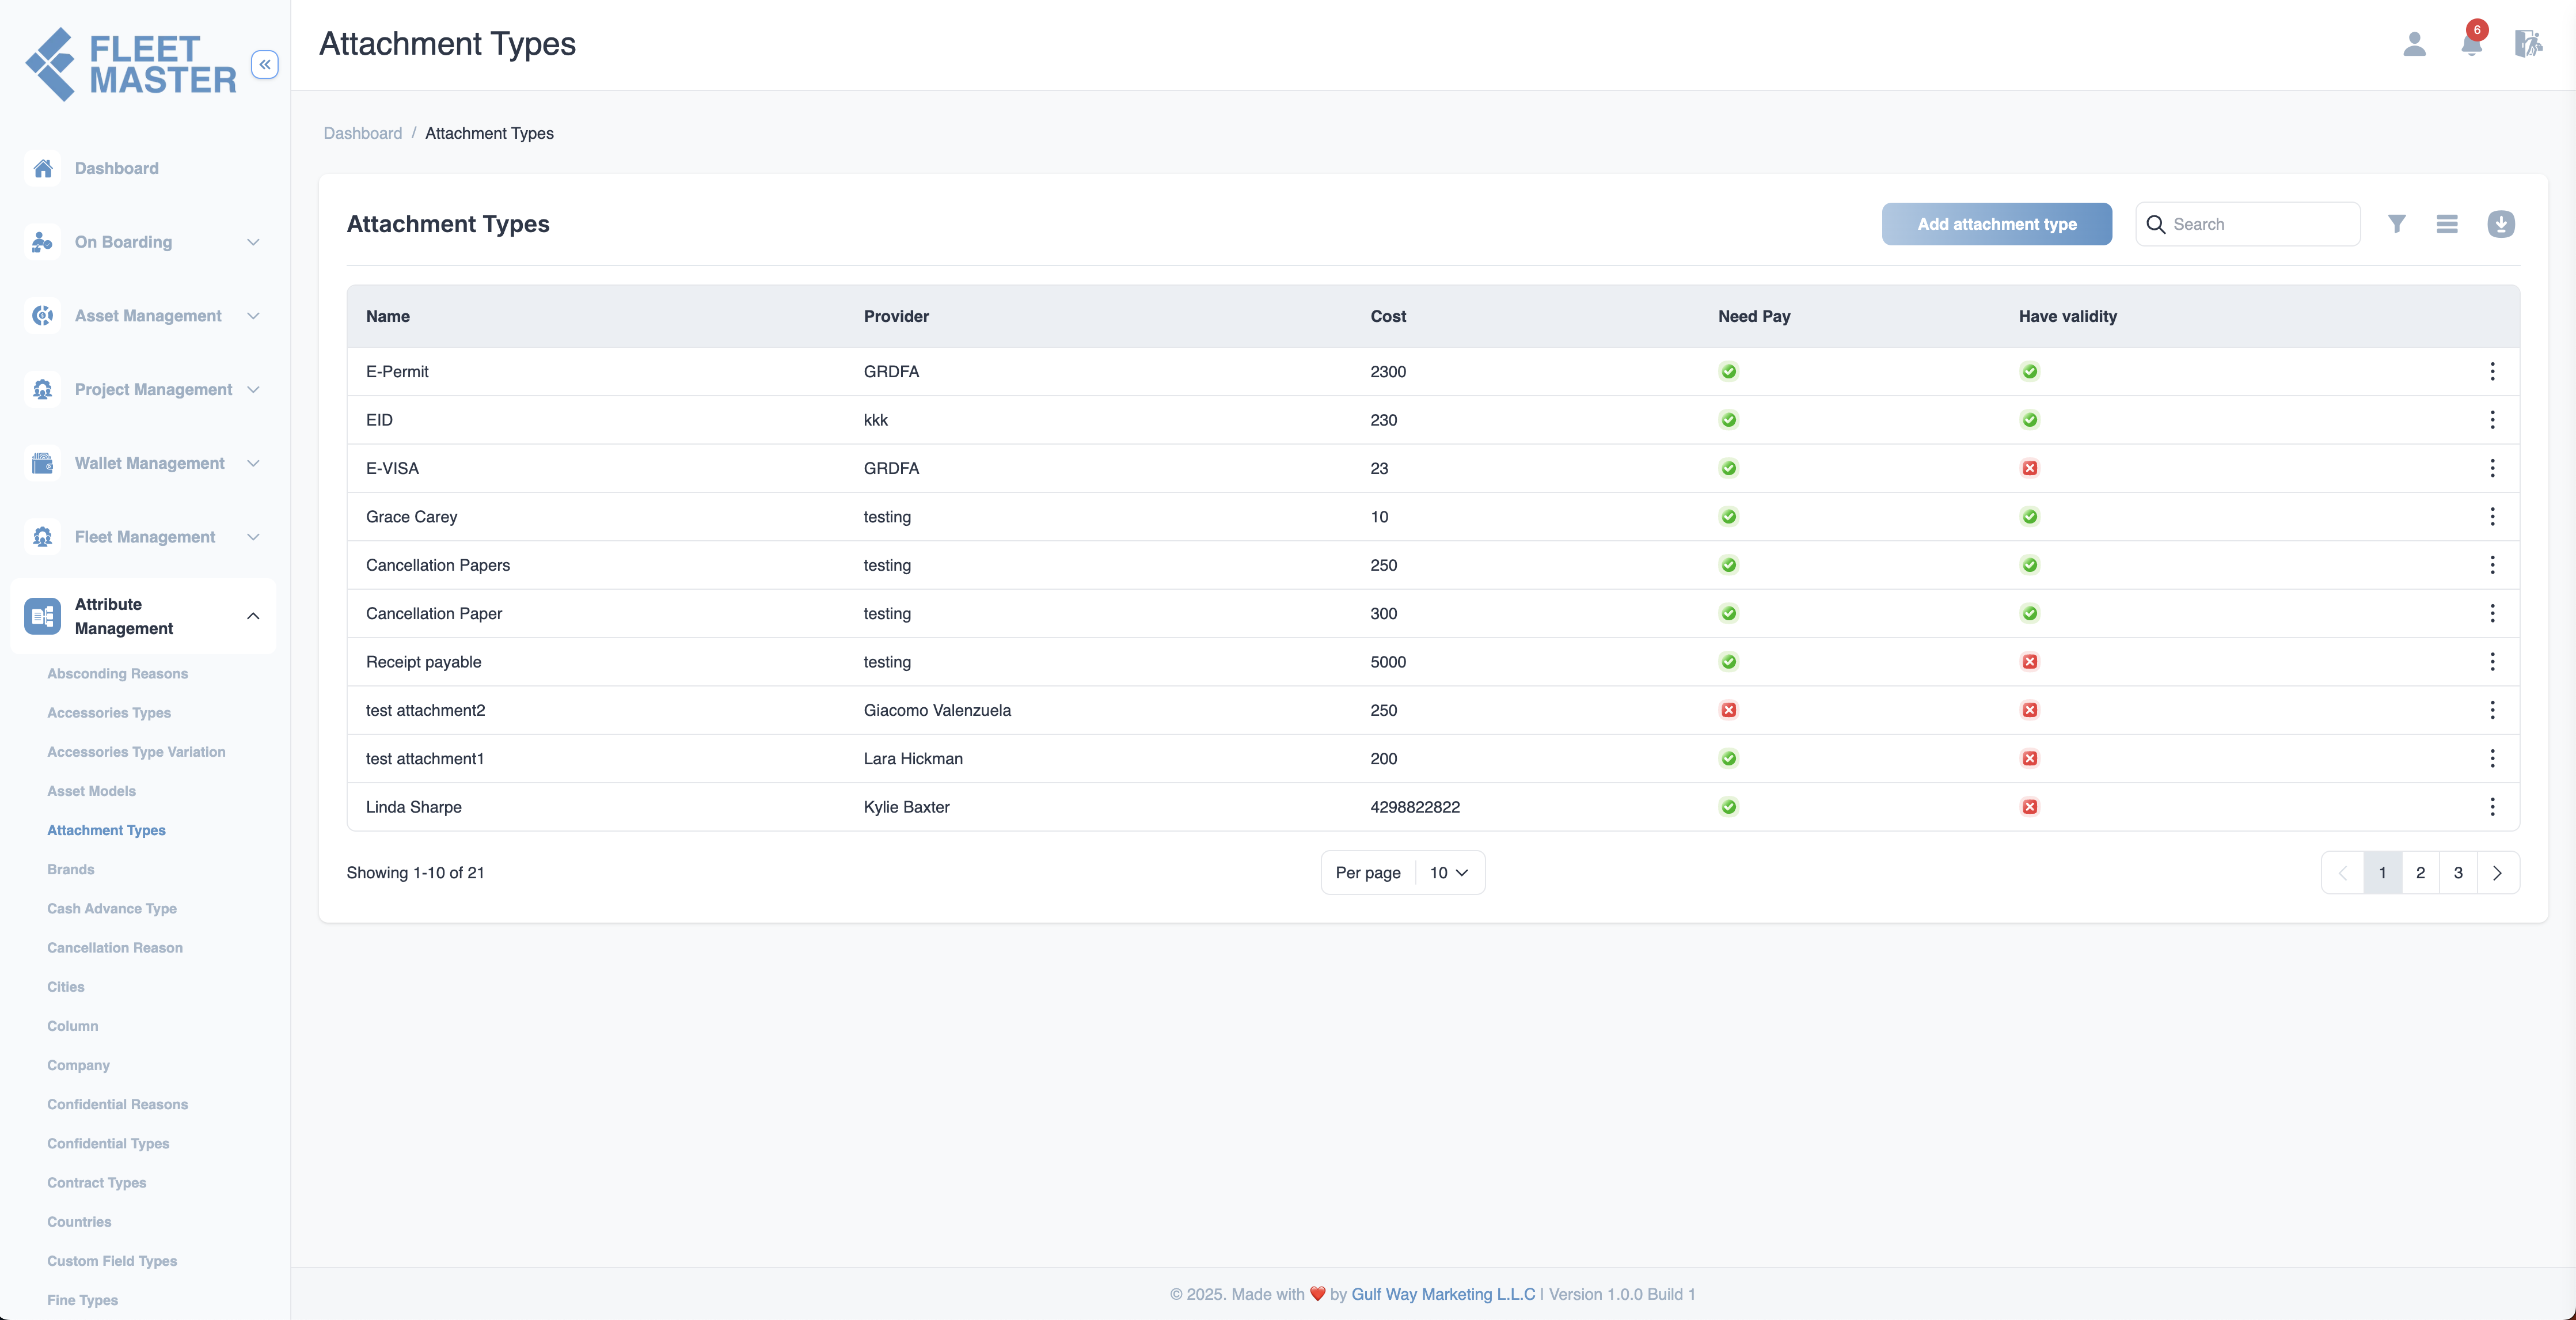
Manage attachment types in fleet master, including how to add, configure payment and validity, and assign role-based permissions for this attribute category.

Viewing and Adding Attachment Types
- Go to the Attributes Management section in the sidebar.
- Select Attachment Types from the list of attribute categories.
- Click Add New Attachment Type.
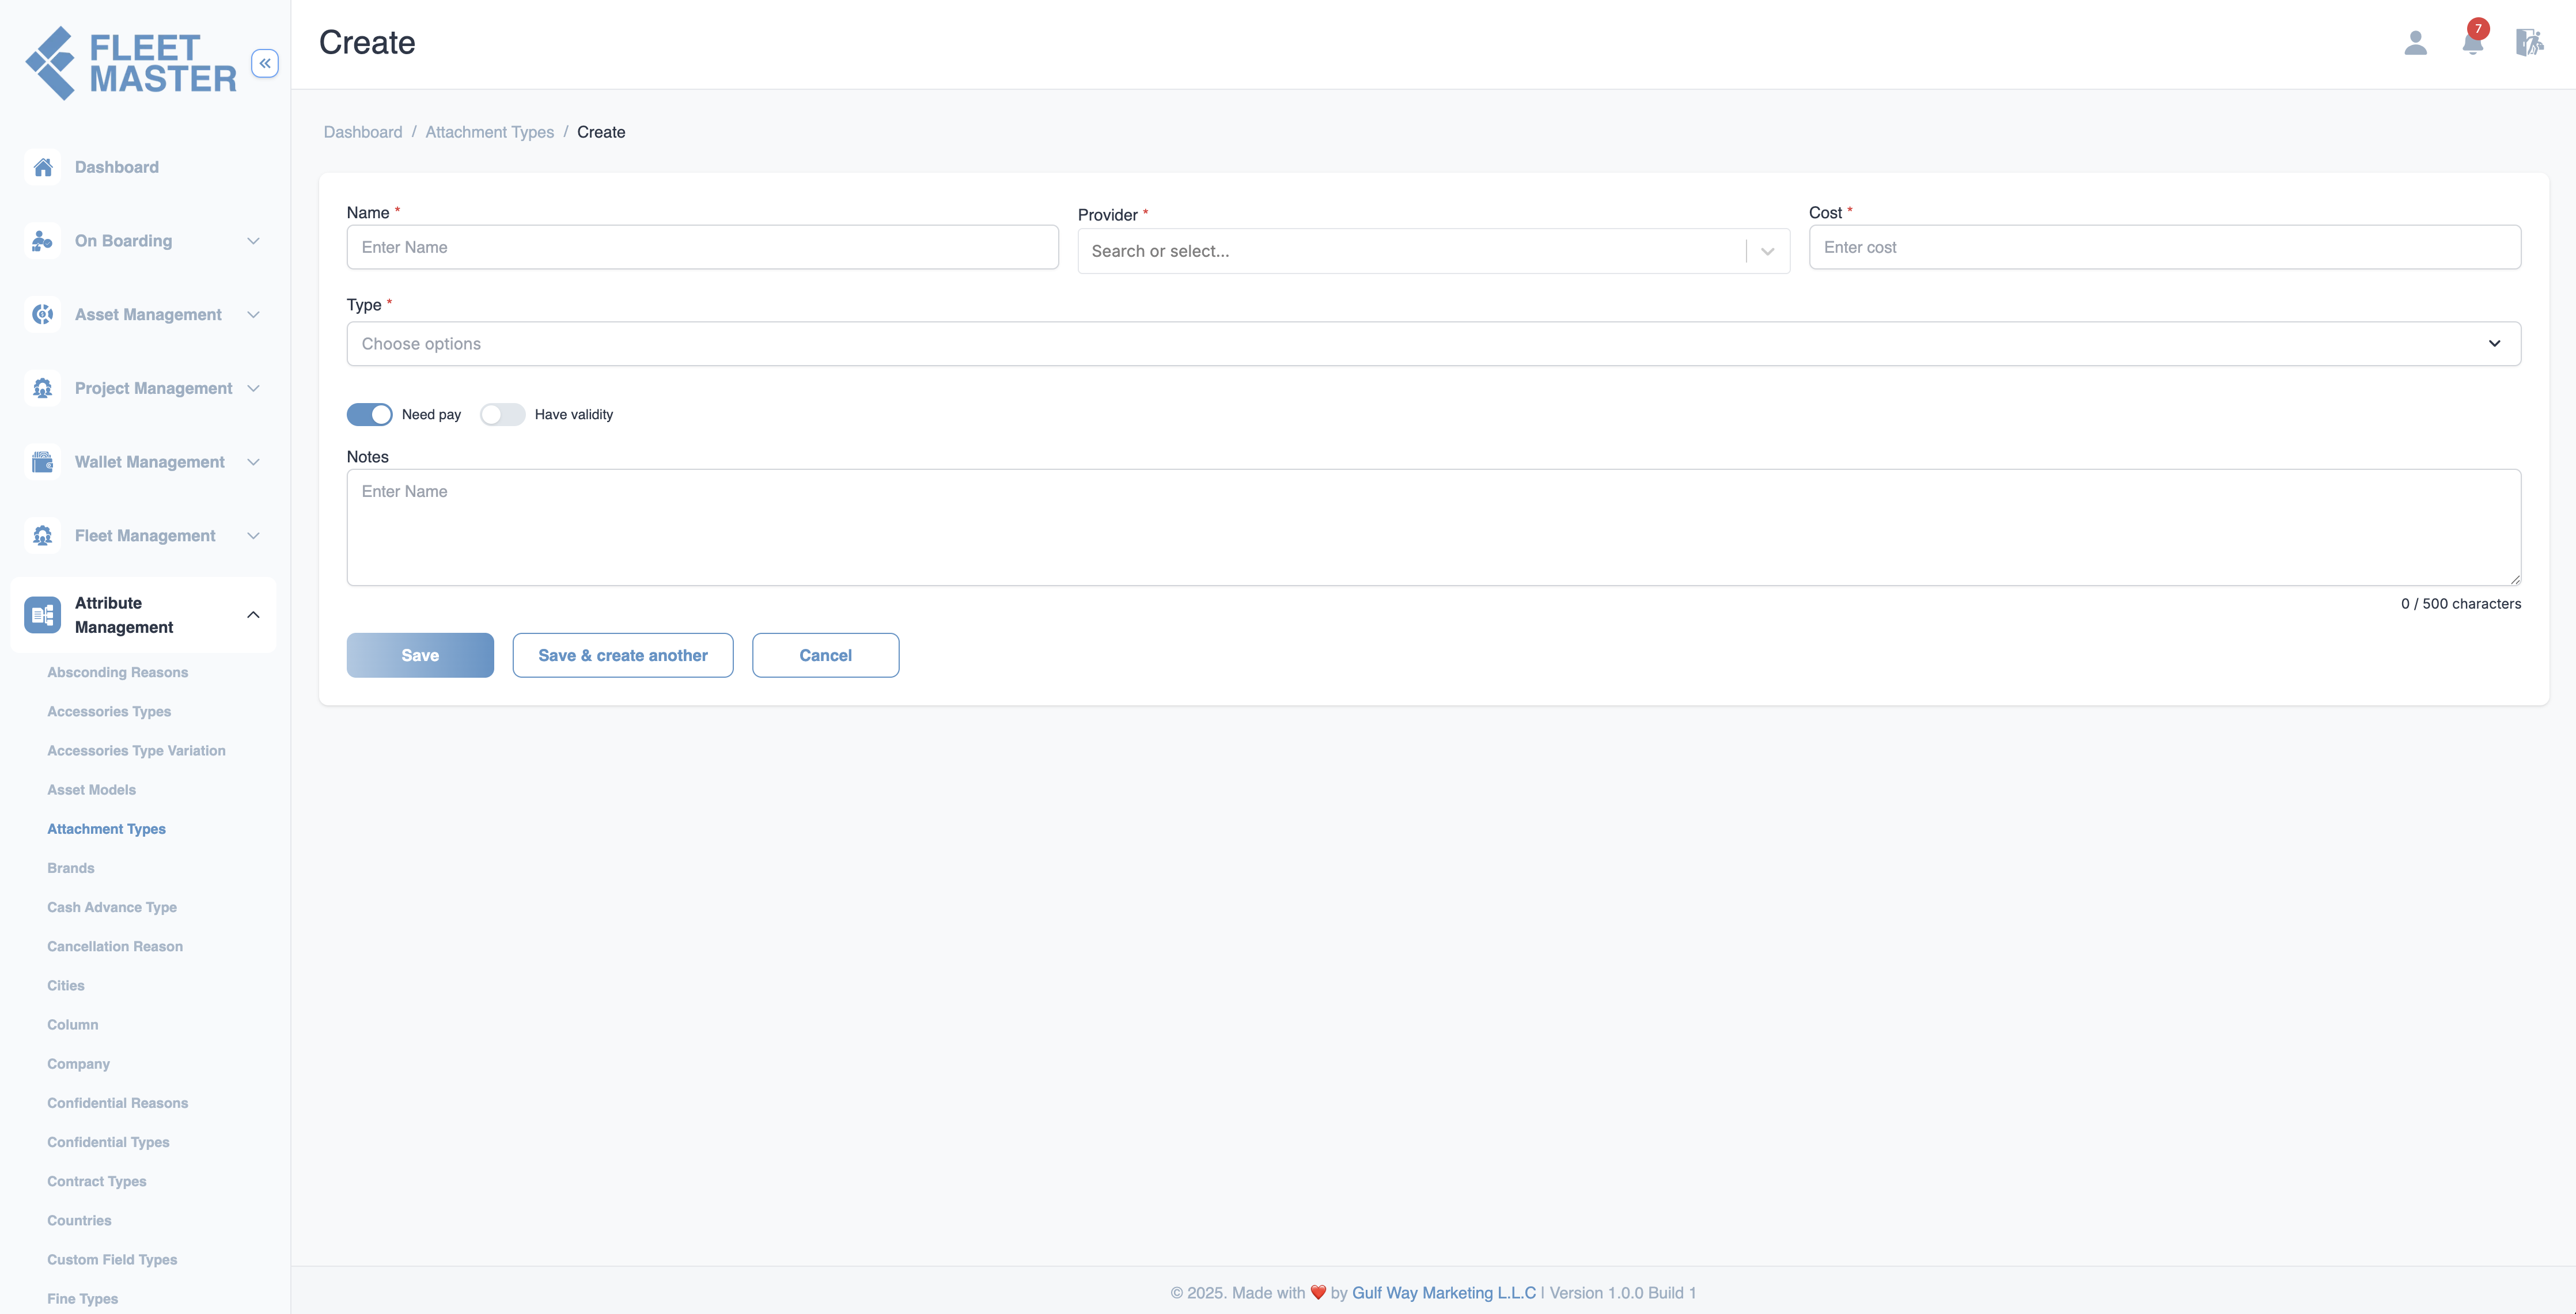
- Fill in the following fields:
- Name (required): Enter the name of the attachment (e.g., Emirates ID, Visa Copy, Driving License).
- Provider (required): Select or search for the document-issuing provider.
- Cost (required): Enter the cost (if any) associated with acquiring the attachment.
- Type (required): Choose the category/type of document from predefined options.
- Need Pay: Toggle ON if the attachment involves a payment.
- Have Validity: Toggle ON if the attachment has an expiration or renewal period.
- Notes: (Optional) Add any relevant notes or instructions (max 500 characters).

Editing or Deleting Attachment Types
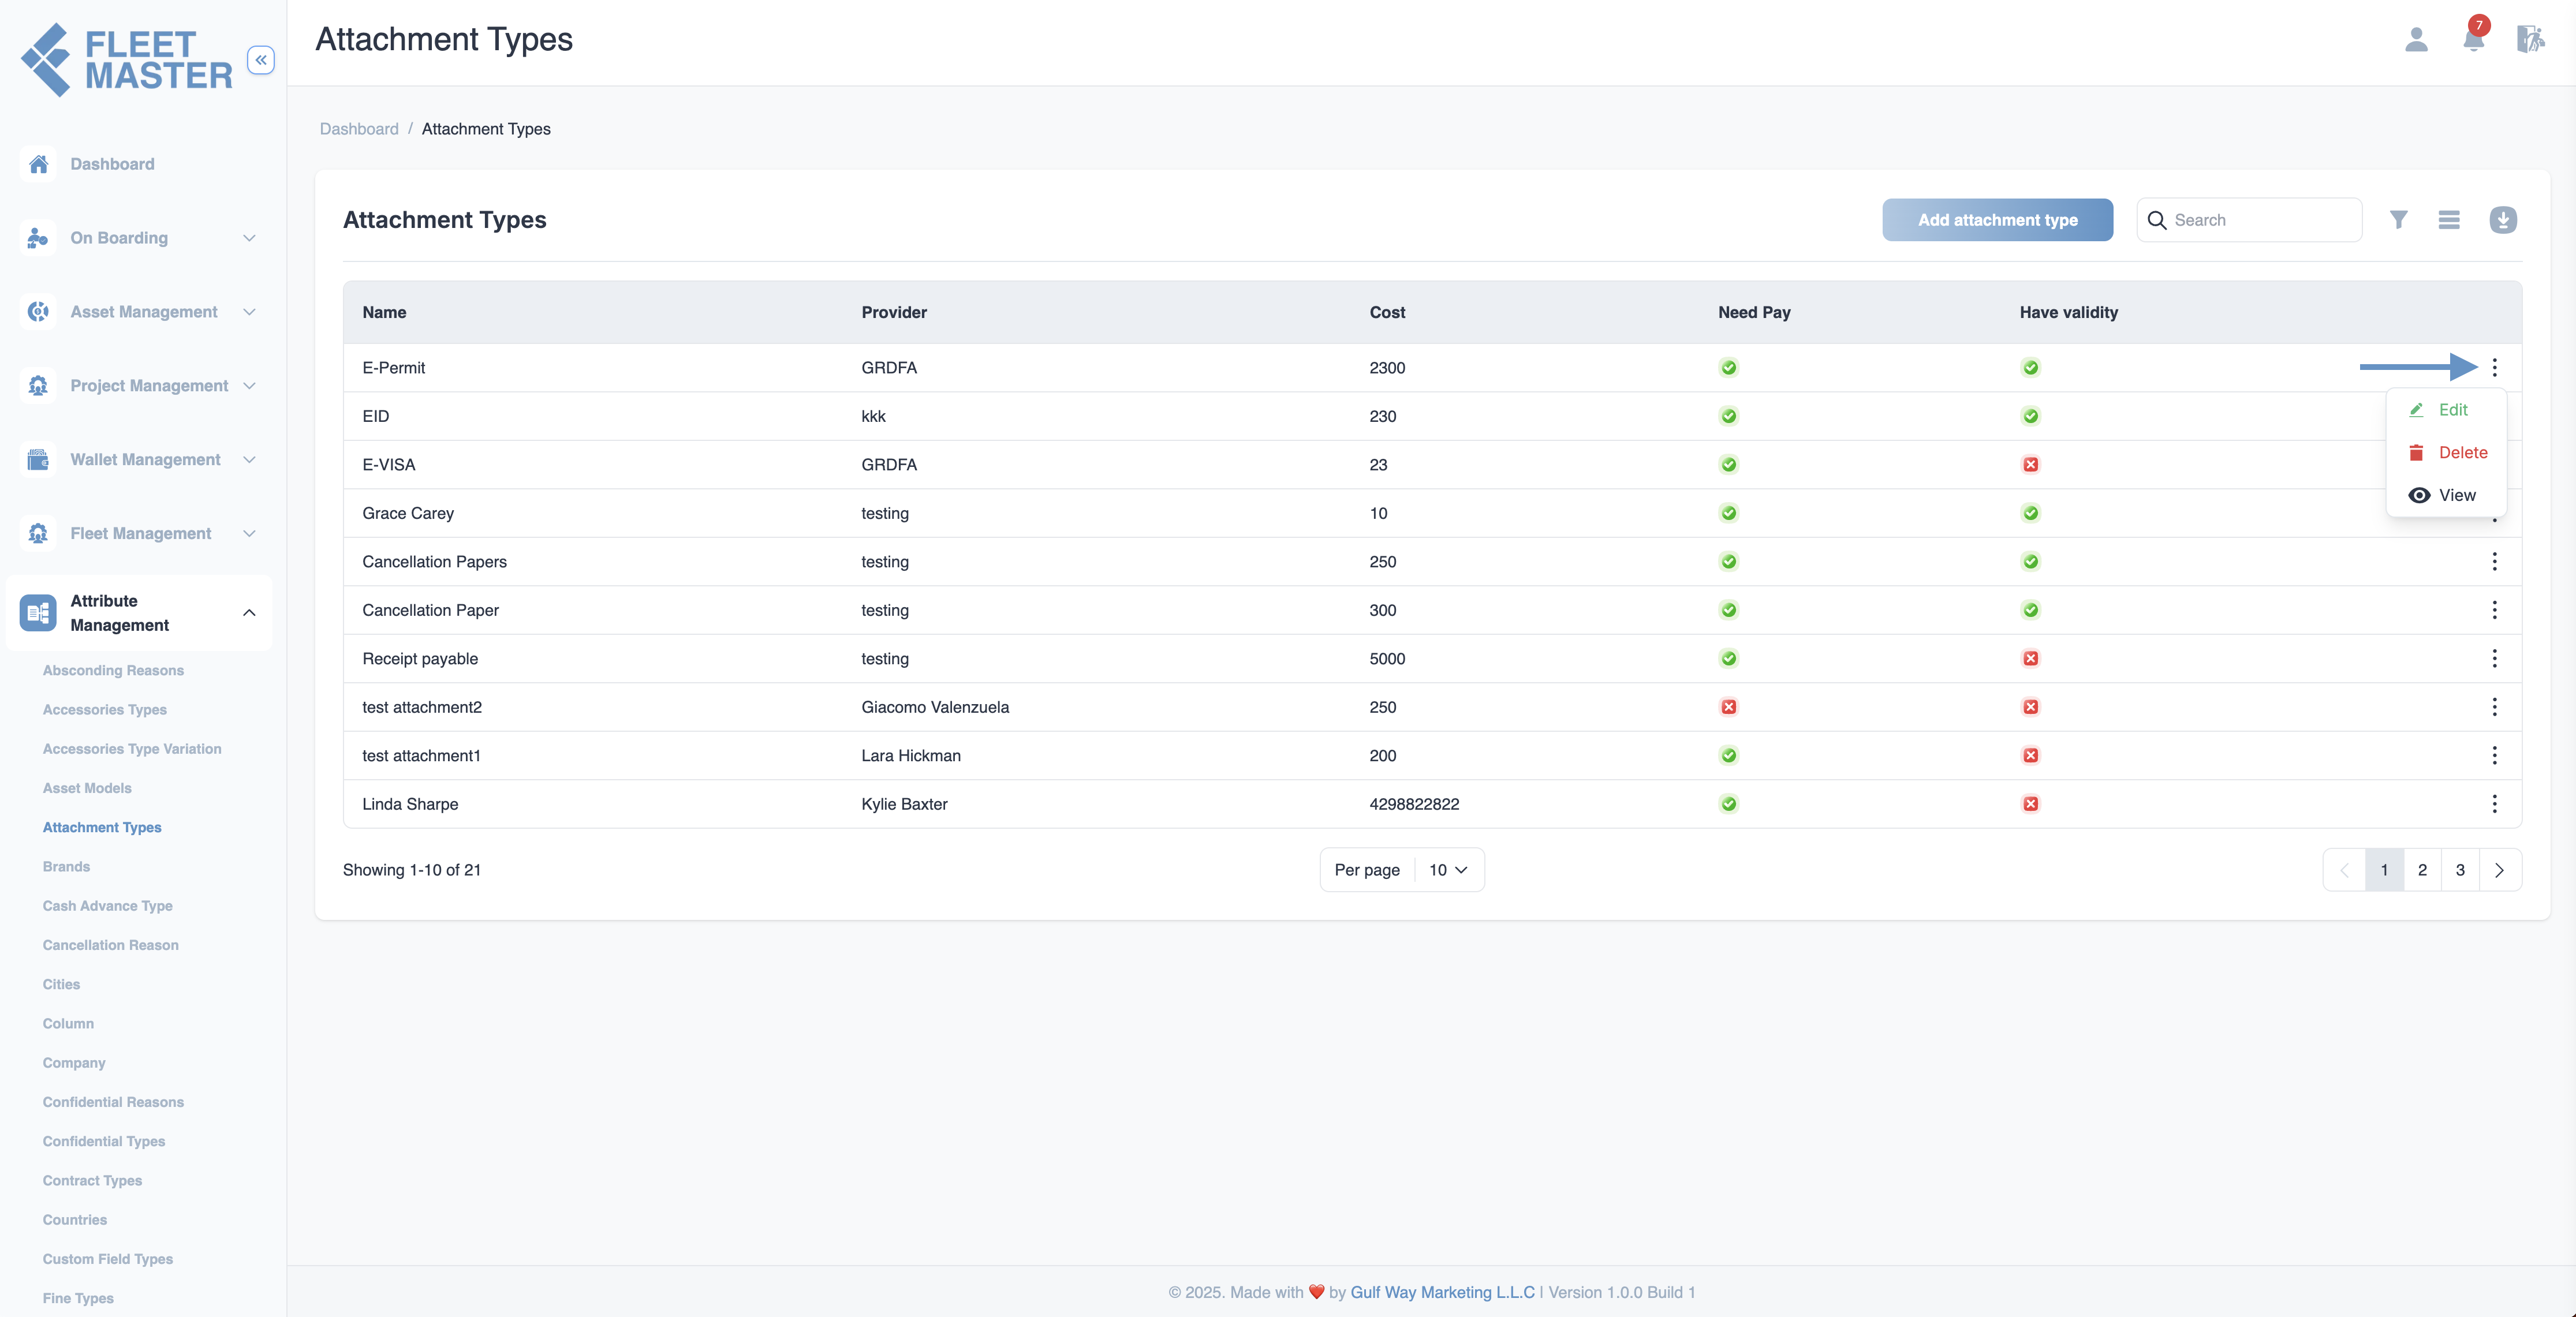
- To edit: Click the Edit button next to an attachment type, update the fields, and click Save.
- To delete: Click the Delete button next to the attachment type you want to remove.

Best Practices
- Use clear, standard naming to ensure consistency across departments.
- Only enable Need Pay for documents that have direct costs.
- Enable Have Validity for time-sensitive documents that require renewal (e.g., visas, licenses).
Tip:
Attachment Types help track and validate critical documents tied to fleets, vehicles, or operations. Keep them well-organized for smooth compliance workflows.
Security Best Practice:
Limit modification permissions to HR or compliance roles to maintain integrity and audit accuracy of document records.