User Roles
Fleet Master allows you to create and manage user roles with detailed permissions across modules such as fleet management, Payroll, and Documents.

Creating a New User Role
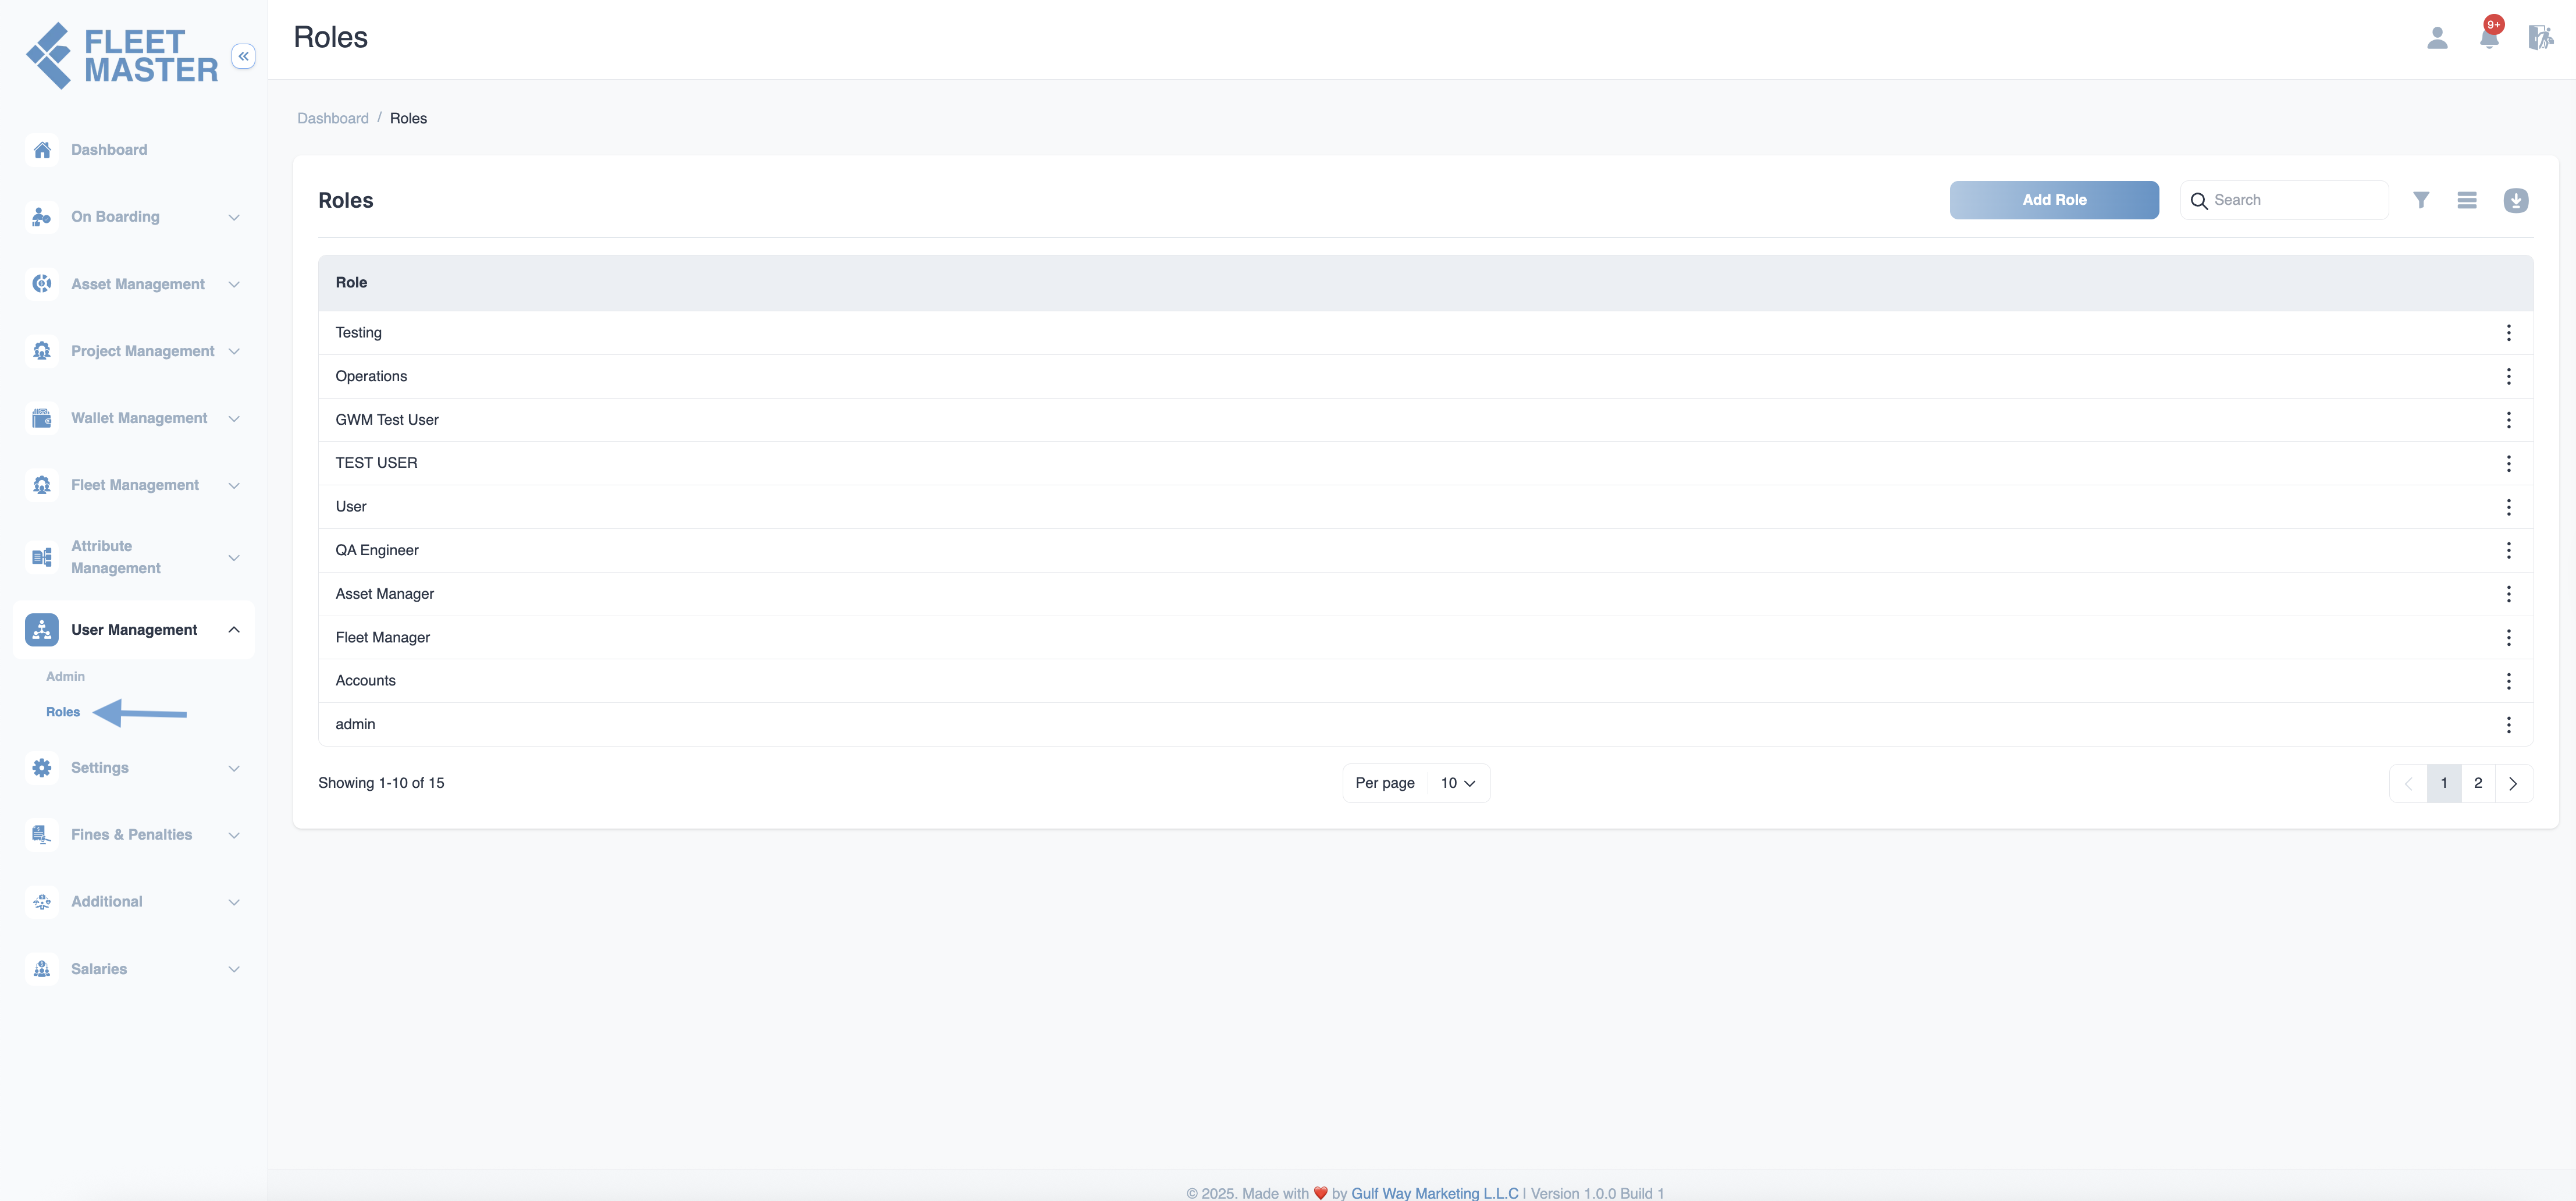
Navigate to the User Roles section using the sidebar and click Create to add a new user role.
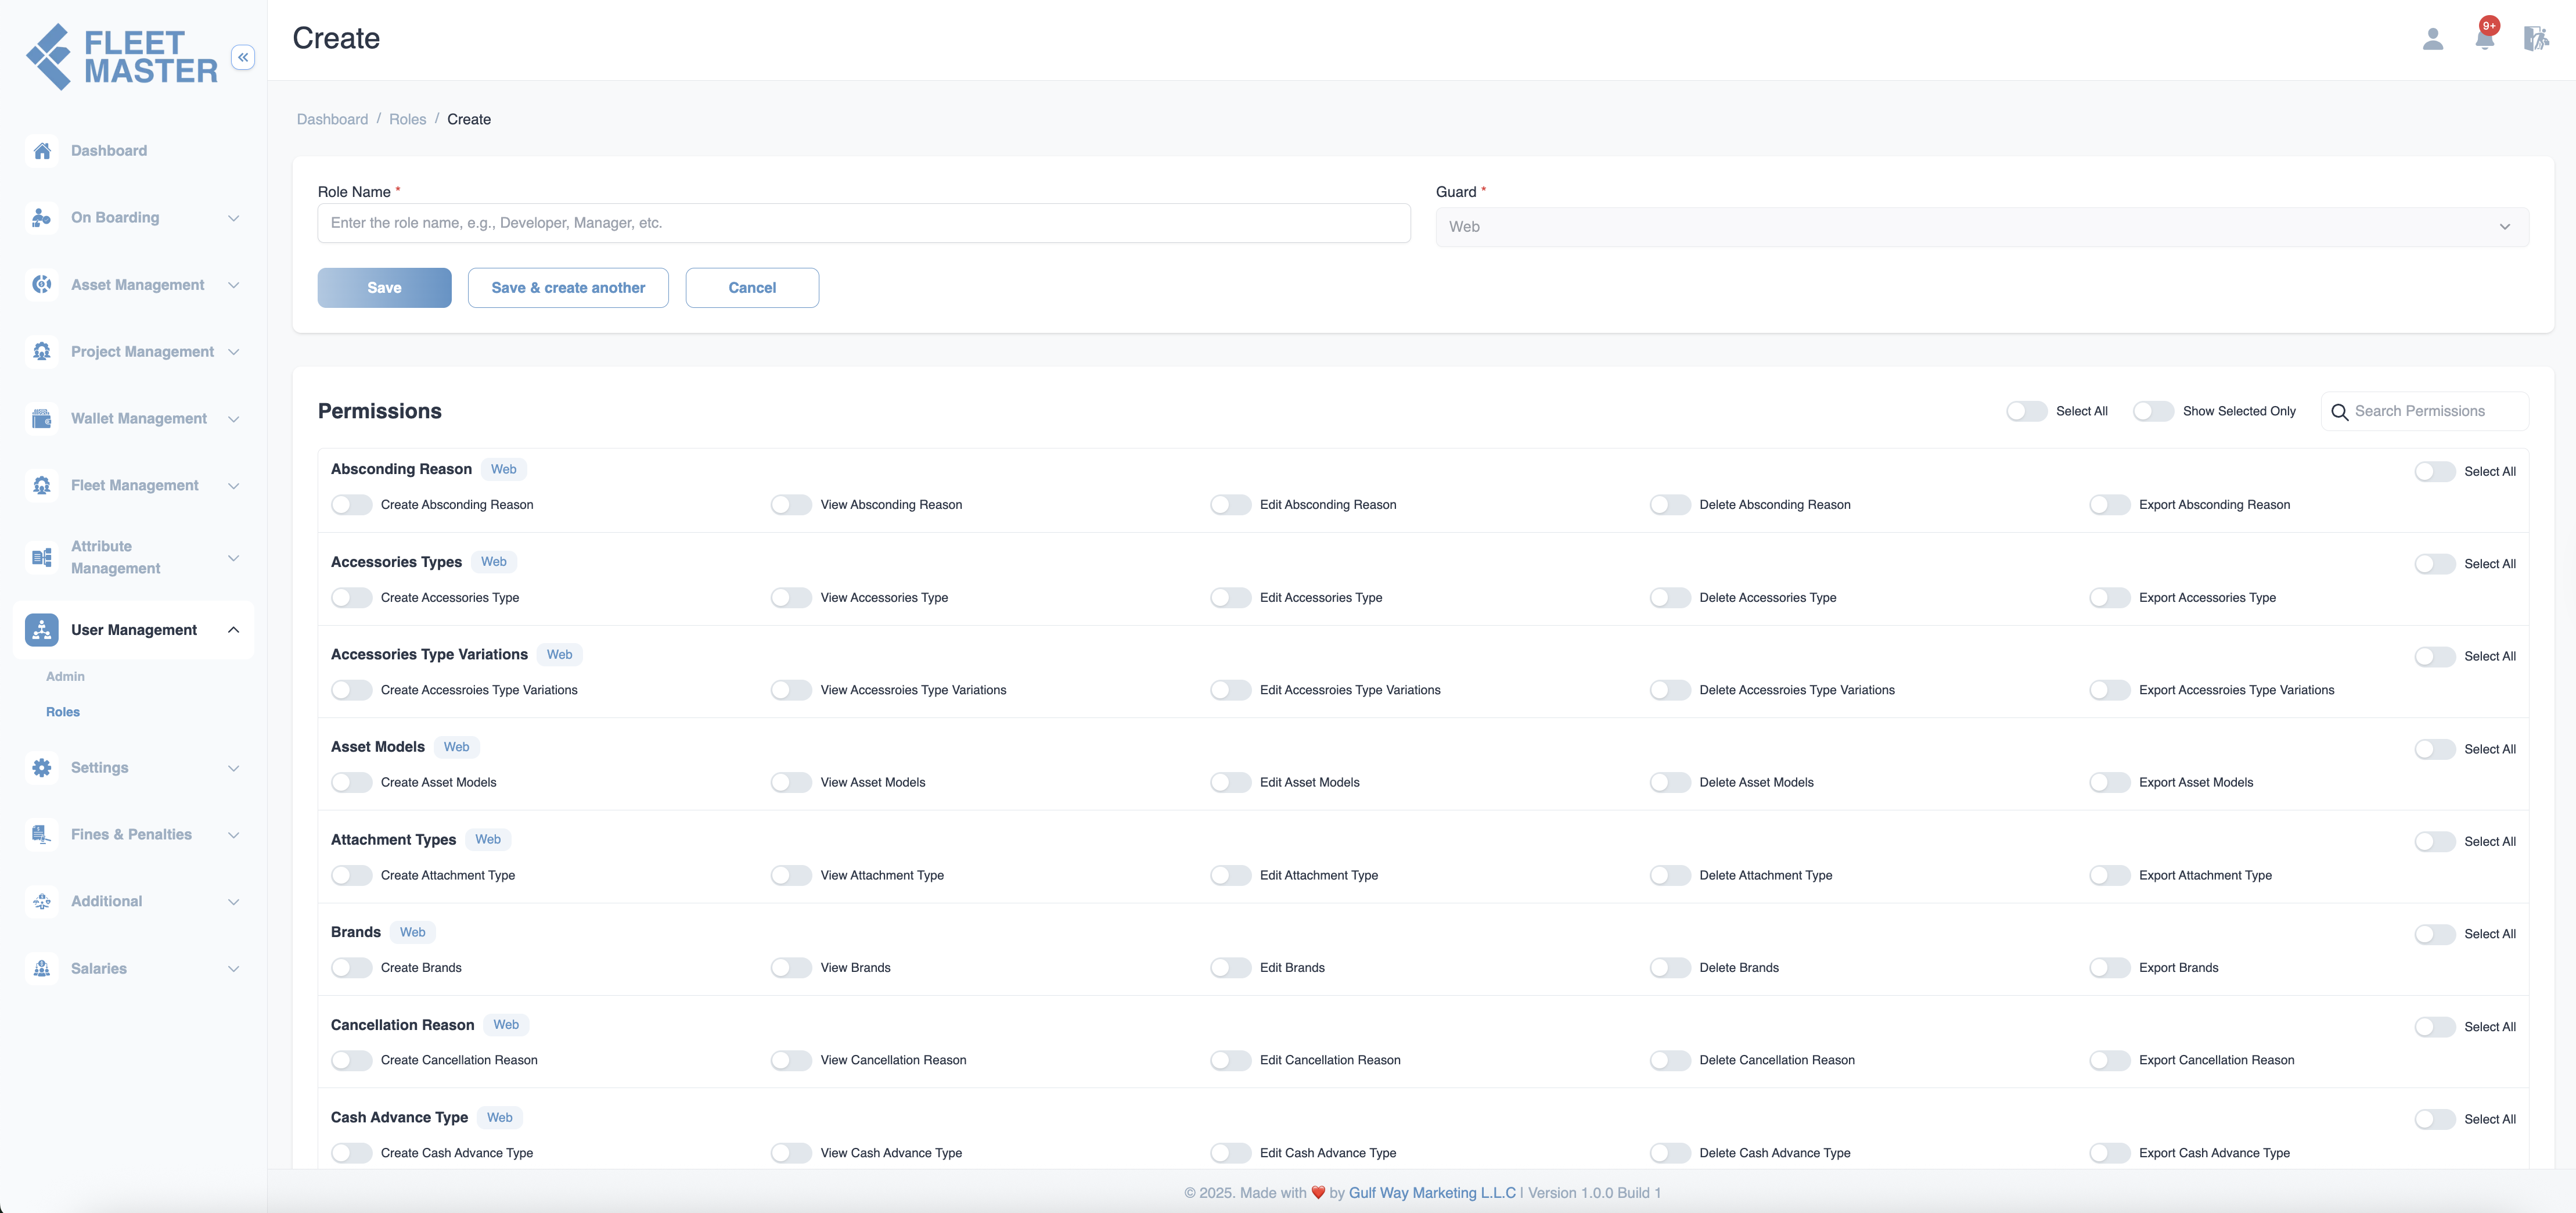
The create user role form includes the following fields:
Role Configuration
- Role Name: Choose a clear and distinct name for the role (e.g., HR Manager, Finance Officer, Ops Coordinator). (Required)
- Guard: Select Web to define access control for web-based users. (Mobile support coming soon.)

Save Options
Fleet Master provides flexible save options:
- Save: Create the role and return to the list.
- Save & Create Another: Create and continue adding more roles.
- Cancel: Discard and return without saving.
Permission Controls
Individual Permission Toggles
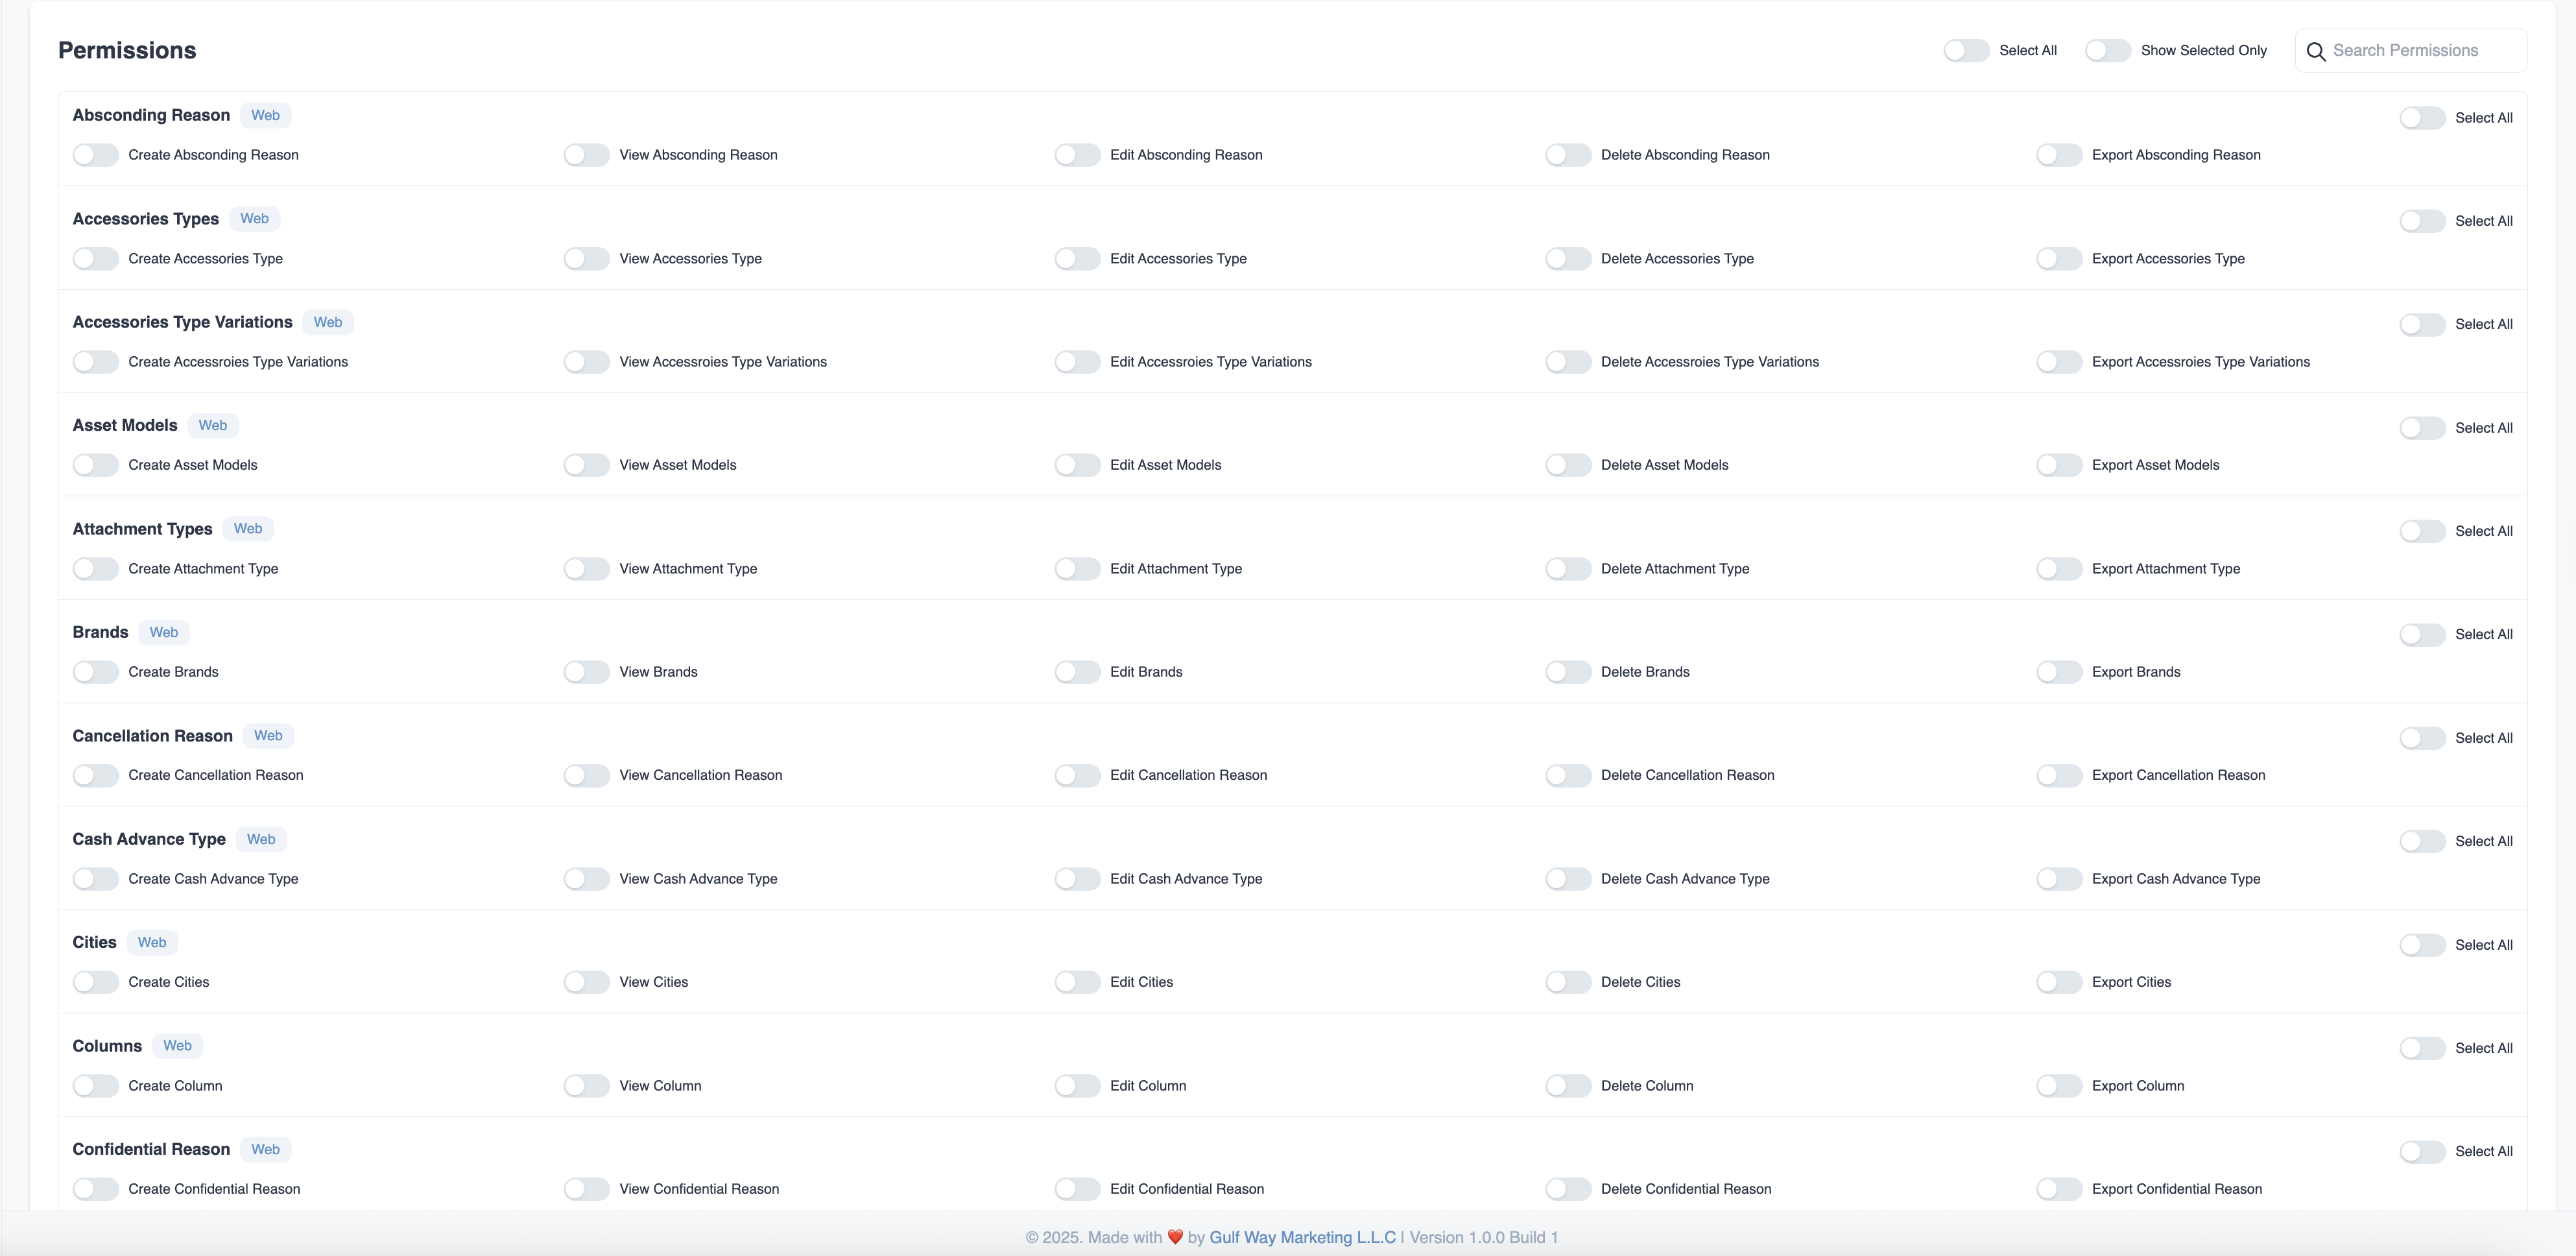
Use toggle switches to enable or disable specific permissions for each module.
Bulk Permission Controls
- Select All: Enable all permissions at once.
- Show Selected Only: Filter to show only enabled permissions.
- Search Permissions: Quickly find a specific permission.
- Module-wise Select All: Quickly toggle all permissions in a single module.

Best Practices for Role Creation
Role Naming Conventions
Use consistent and descriptive names:
- HR Manager – Full access to fleet and document management
- Finance Officer – Full access to salary, reports, and installments
- Operations Lead – Project and assignment management
- Viewer – Read-only access across selected modules
Permission Assignment Guidelines
- Least Privilege Principle: Assign only what is needed.
- Module Relevance: Match permissions to the role's actual responsibilities.
- Regular Reviews: Audit role permissions regularly to ensure continued relevance.
Important:
Over-permission roles can compromise data privacy and system security. Review permissions carefully before saving.
Security Best Practice:
Use Show Selected Only before saving to audit granted permissions efficiently.