Vehicle Record Management
View, update, and manage all registered vehicle assets in Fleet Master. This section covers actions like editing, searching, printing labels, and understanding which fields are locked after creation.

Overview
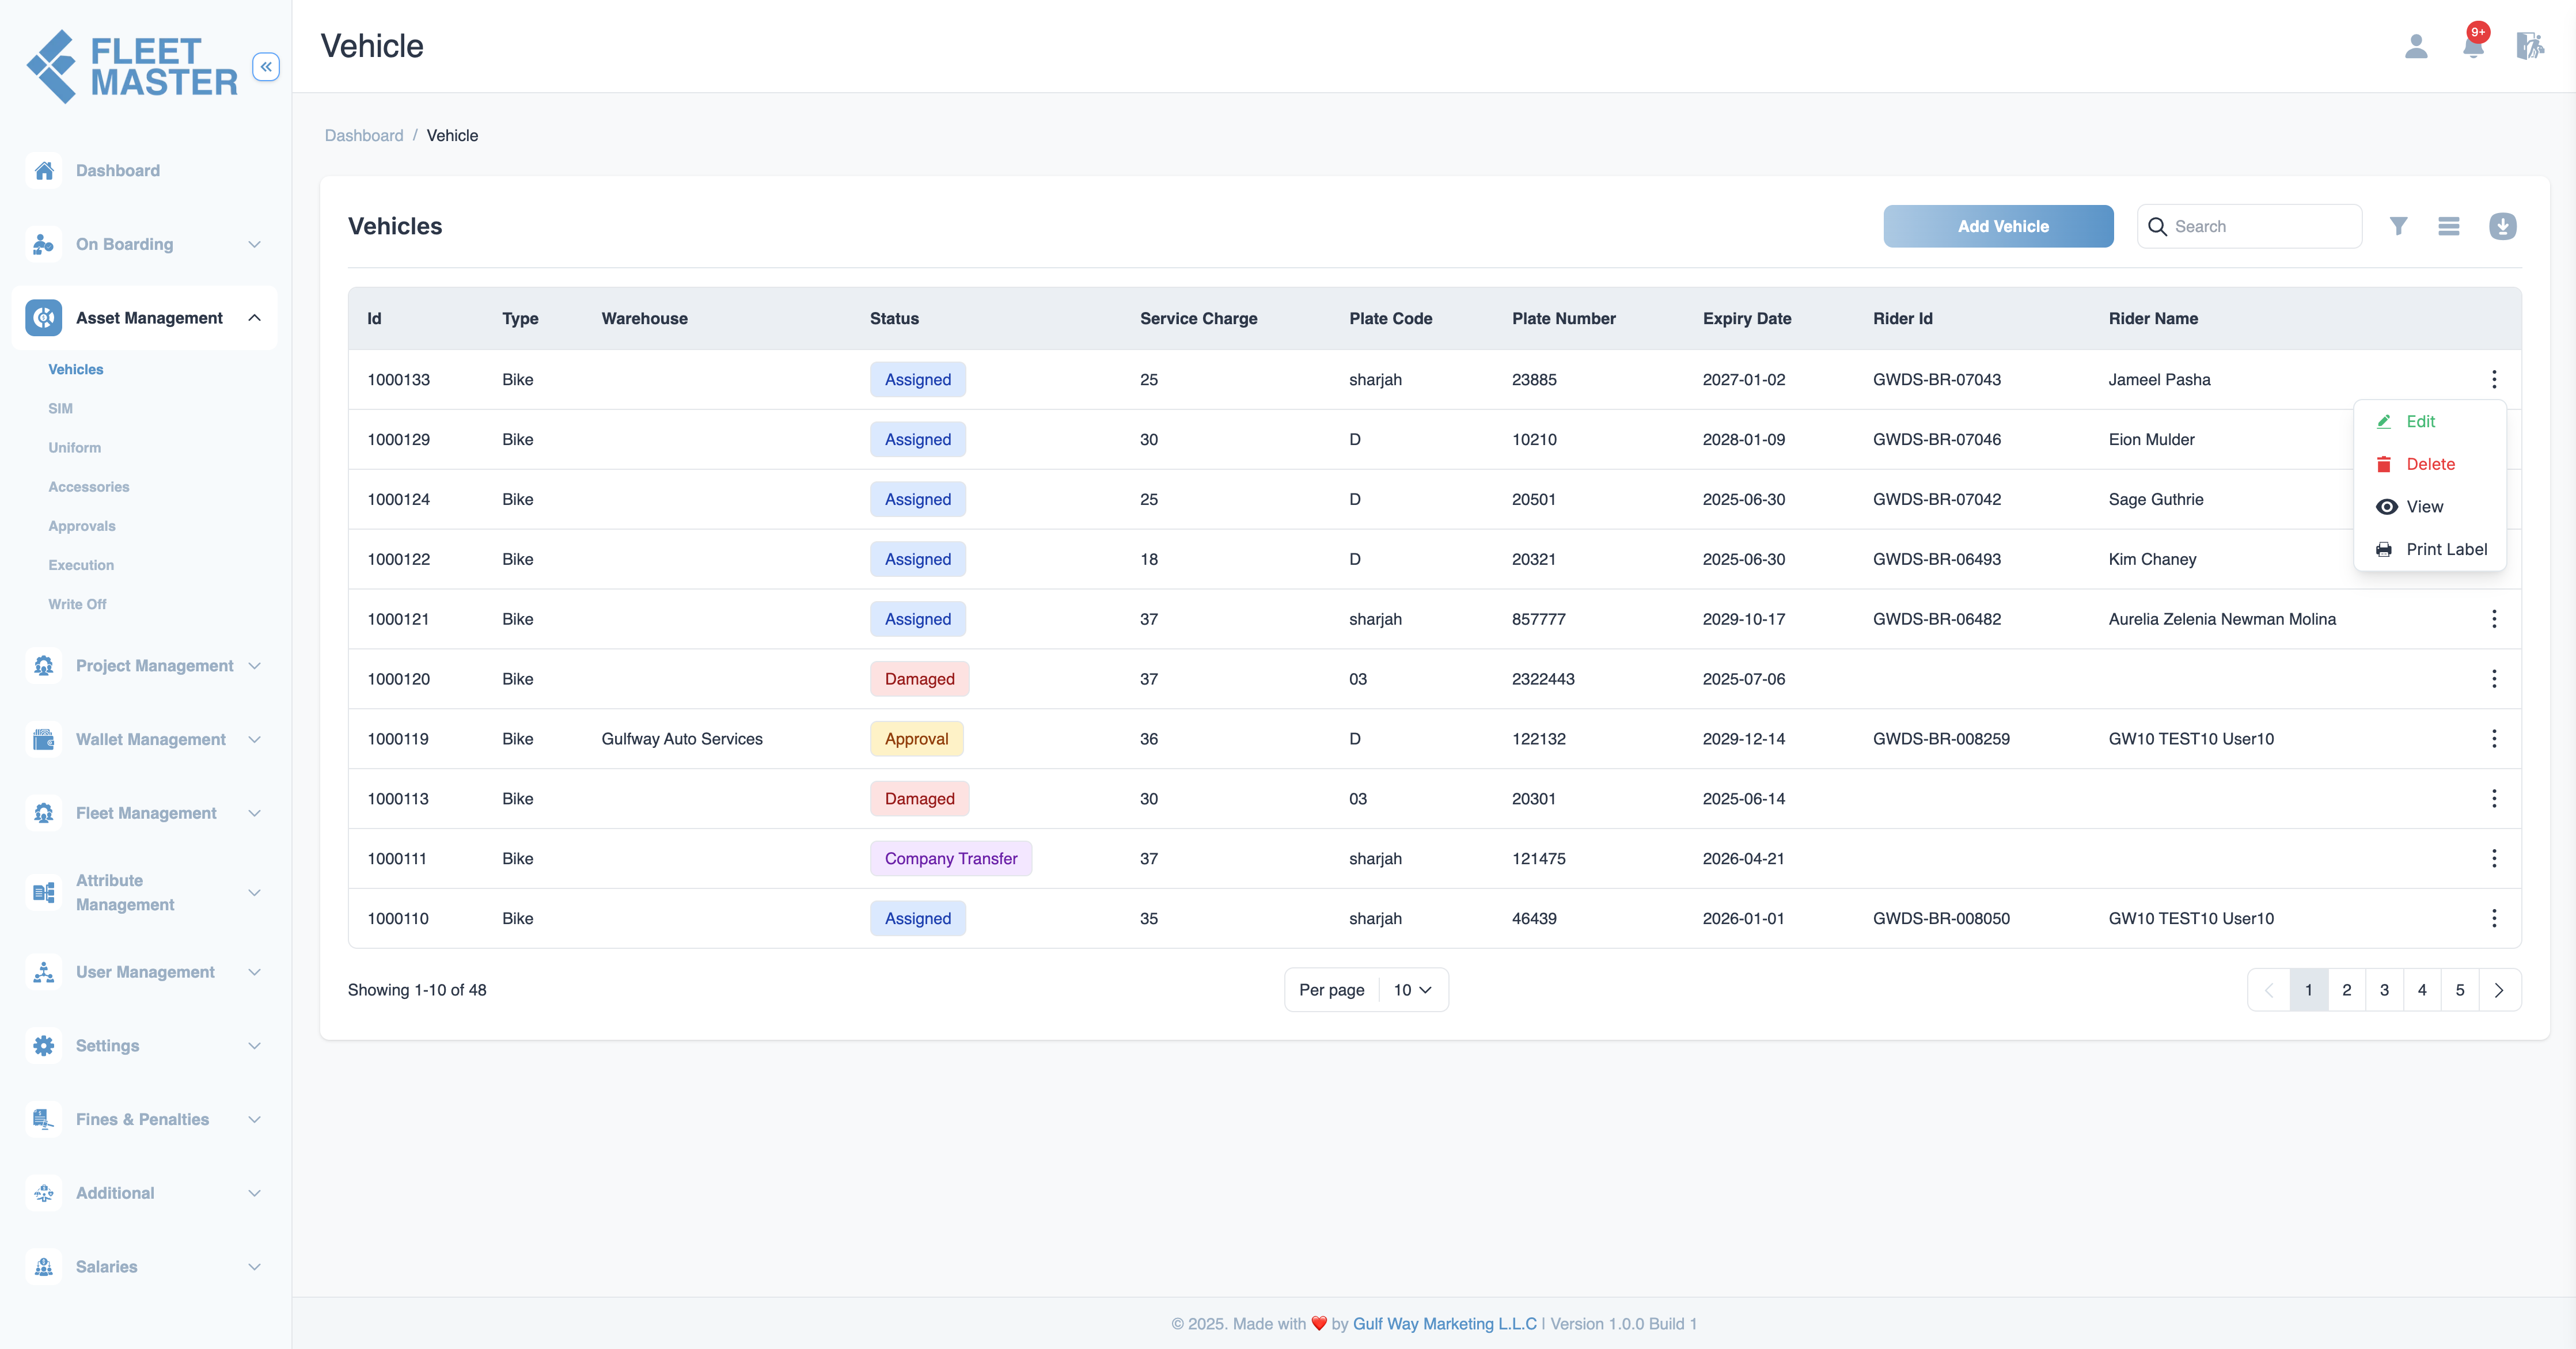
Once a vehicle is created in Fleet Master, it appears in the Vehicle Records list. This centralized dashboard lets you search, view, and manage all vehicles currently registered in the system.
The record view provides important operational controls like viewing full details, editing allowed fields, label printing, and initiating lifecycle transitions such as assignment or transfer.
Key Actions in Record View
Each vehicle row offers quick access to major actions:
| Action | Description |
|---|---|
| View | Open full vehicle profile to see all stored details |
| Edit | Modify editable fields (insurance, GPS, service charge, etc.) |
| Delete | Remove the vehicle from the system (if not yet assigned or used) |
| Print Label | Generate and print a QR or barcode label for warehouse identification |
| Transition | Move vehicle between lifecycle statuses (e.g., Standby → Ready to Allocate) |
Search & Filter Options
To easily locate a vehicle, you can filter or search by:
- Vehicle Type (e.g., Car, Truck)
- Plate Number
- Chassis Number
- Status (Waiting, Assigned, etc.)
- GPS Installed (Yes/No)
- Warehouse / Rack / Section
- Insurance Expiry Date
Editing a Vehicle
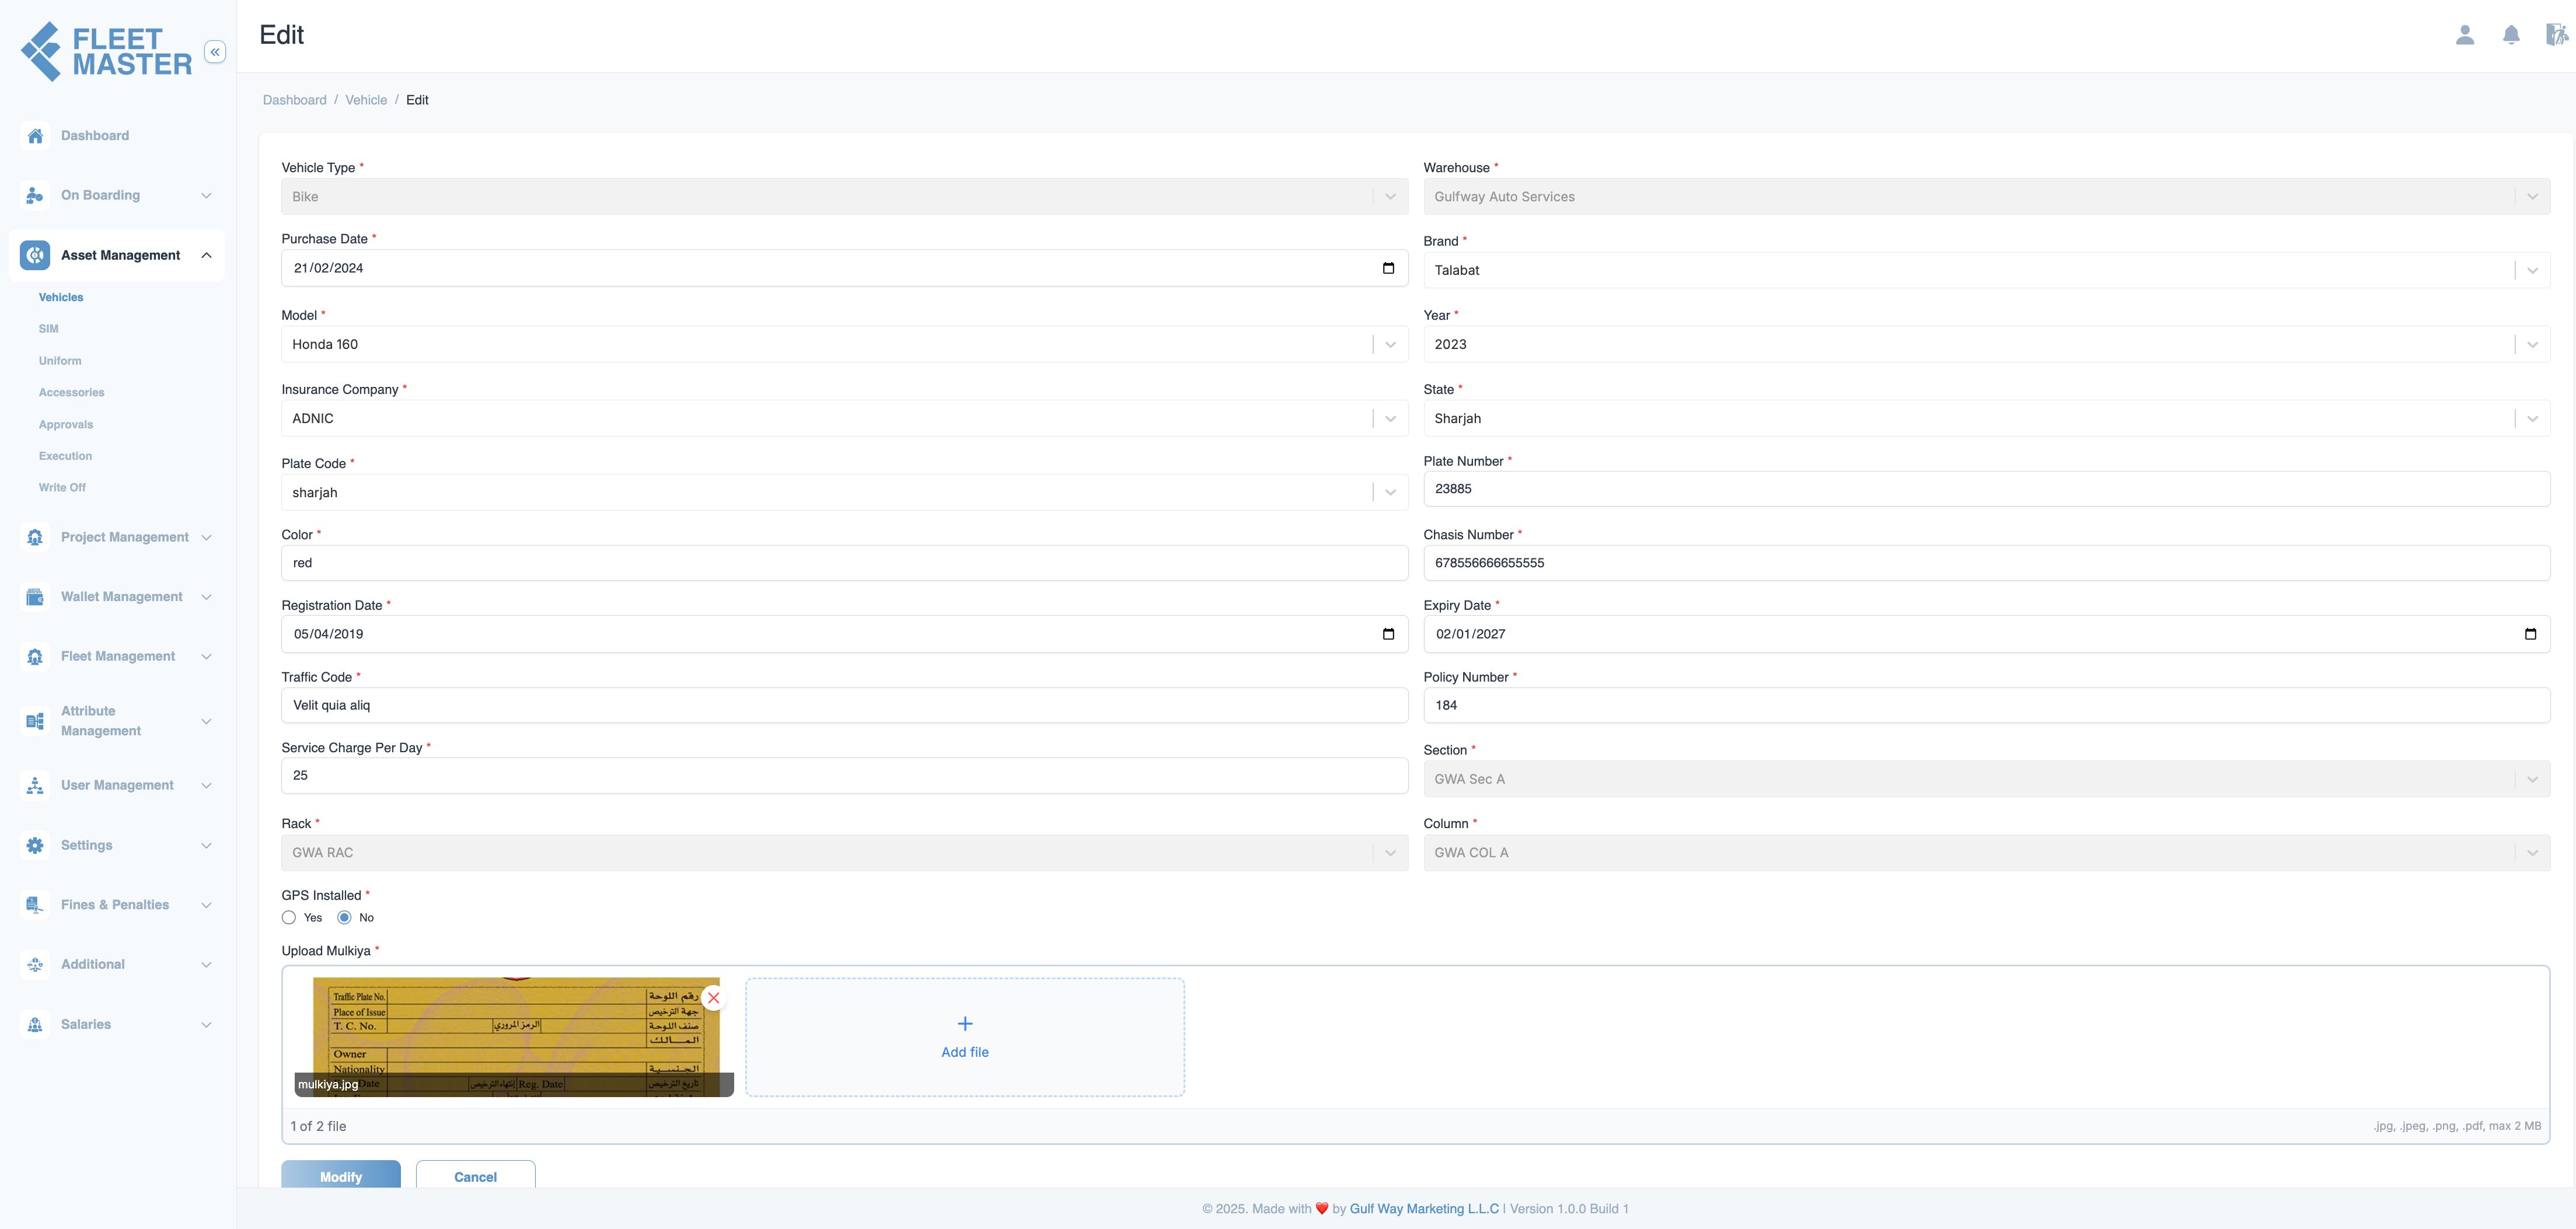
Only certain fields can be edited after creation. This ensures lifecycle consistency and audit safety.
| Field | Editable After Creation? |
|---|---|
| Vehicle Type | ❌ No |
| Warehouse | ❌ No |
| Rack / Section / Column | ❌ No |
| Plate Number | ✅ Yes |
| Chassis Number | ✅ Yes |
| Insurance Info | ✅ Yes |
| Mulkiya Upload | ✅ Yes |
| Service Charge | ✅ Yes |
| GPS Installed | ✅ Yes |
Note:
To change rack or warehouse, initiate a transfer or write-off procedure.

Deleting a Vehicle
A vehicle can only be deleted if:
- It has not been assigned to any fleet or project.
- It has not entered any lifecycle transition (still in Waiting).
- The user has Admin or Manager privileges.
Once a vehicle is assigned or transitioned, deletion is disabled to preserve audit integrity.
QR/Barcode Label Printing
You can generate a physical label for warehouse tagging.
Each label includes:
- Plate Number
- Chassis Number (optional)
- QR/Barcode linked to the vehicle profile
- Rack/Section info
Note:
Labels are useful for scanning during audits, physical inspections, and warehouse operations.
Best Practices
- Review insurance expiry regularly from the list view
- Print and apply physical labels for easier scanning during movement or reassignment
- Re-upload updated Mulkiya or insurance documents whenever renewed
- Avoid manual edits to warehouse fields — always use system transitions