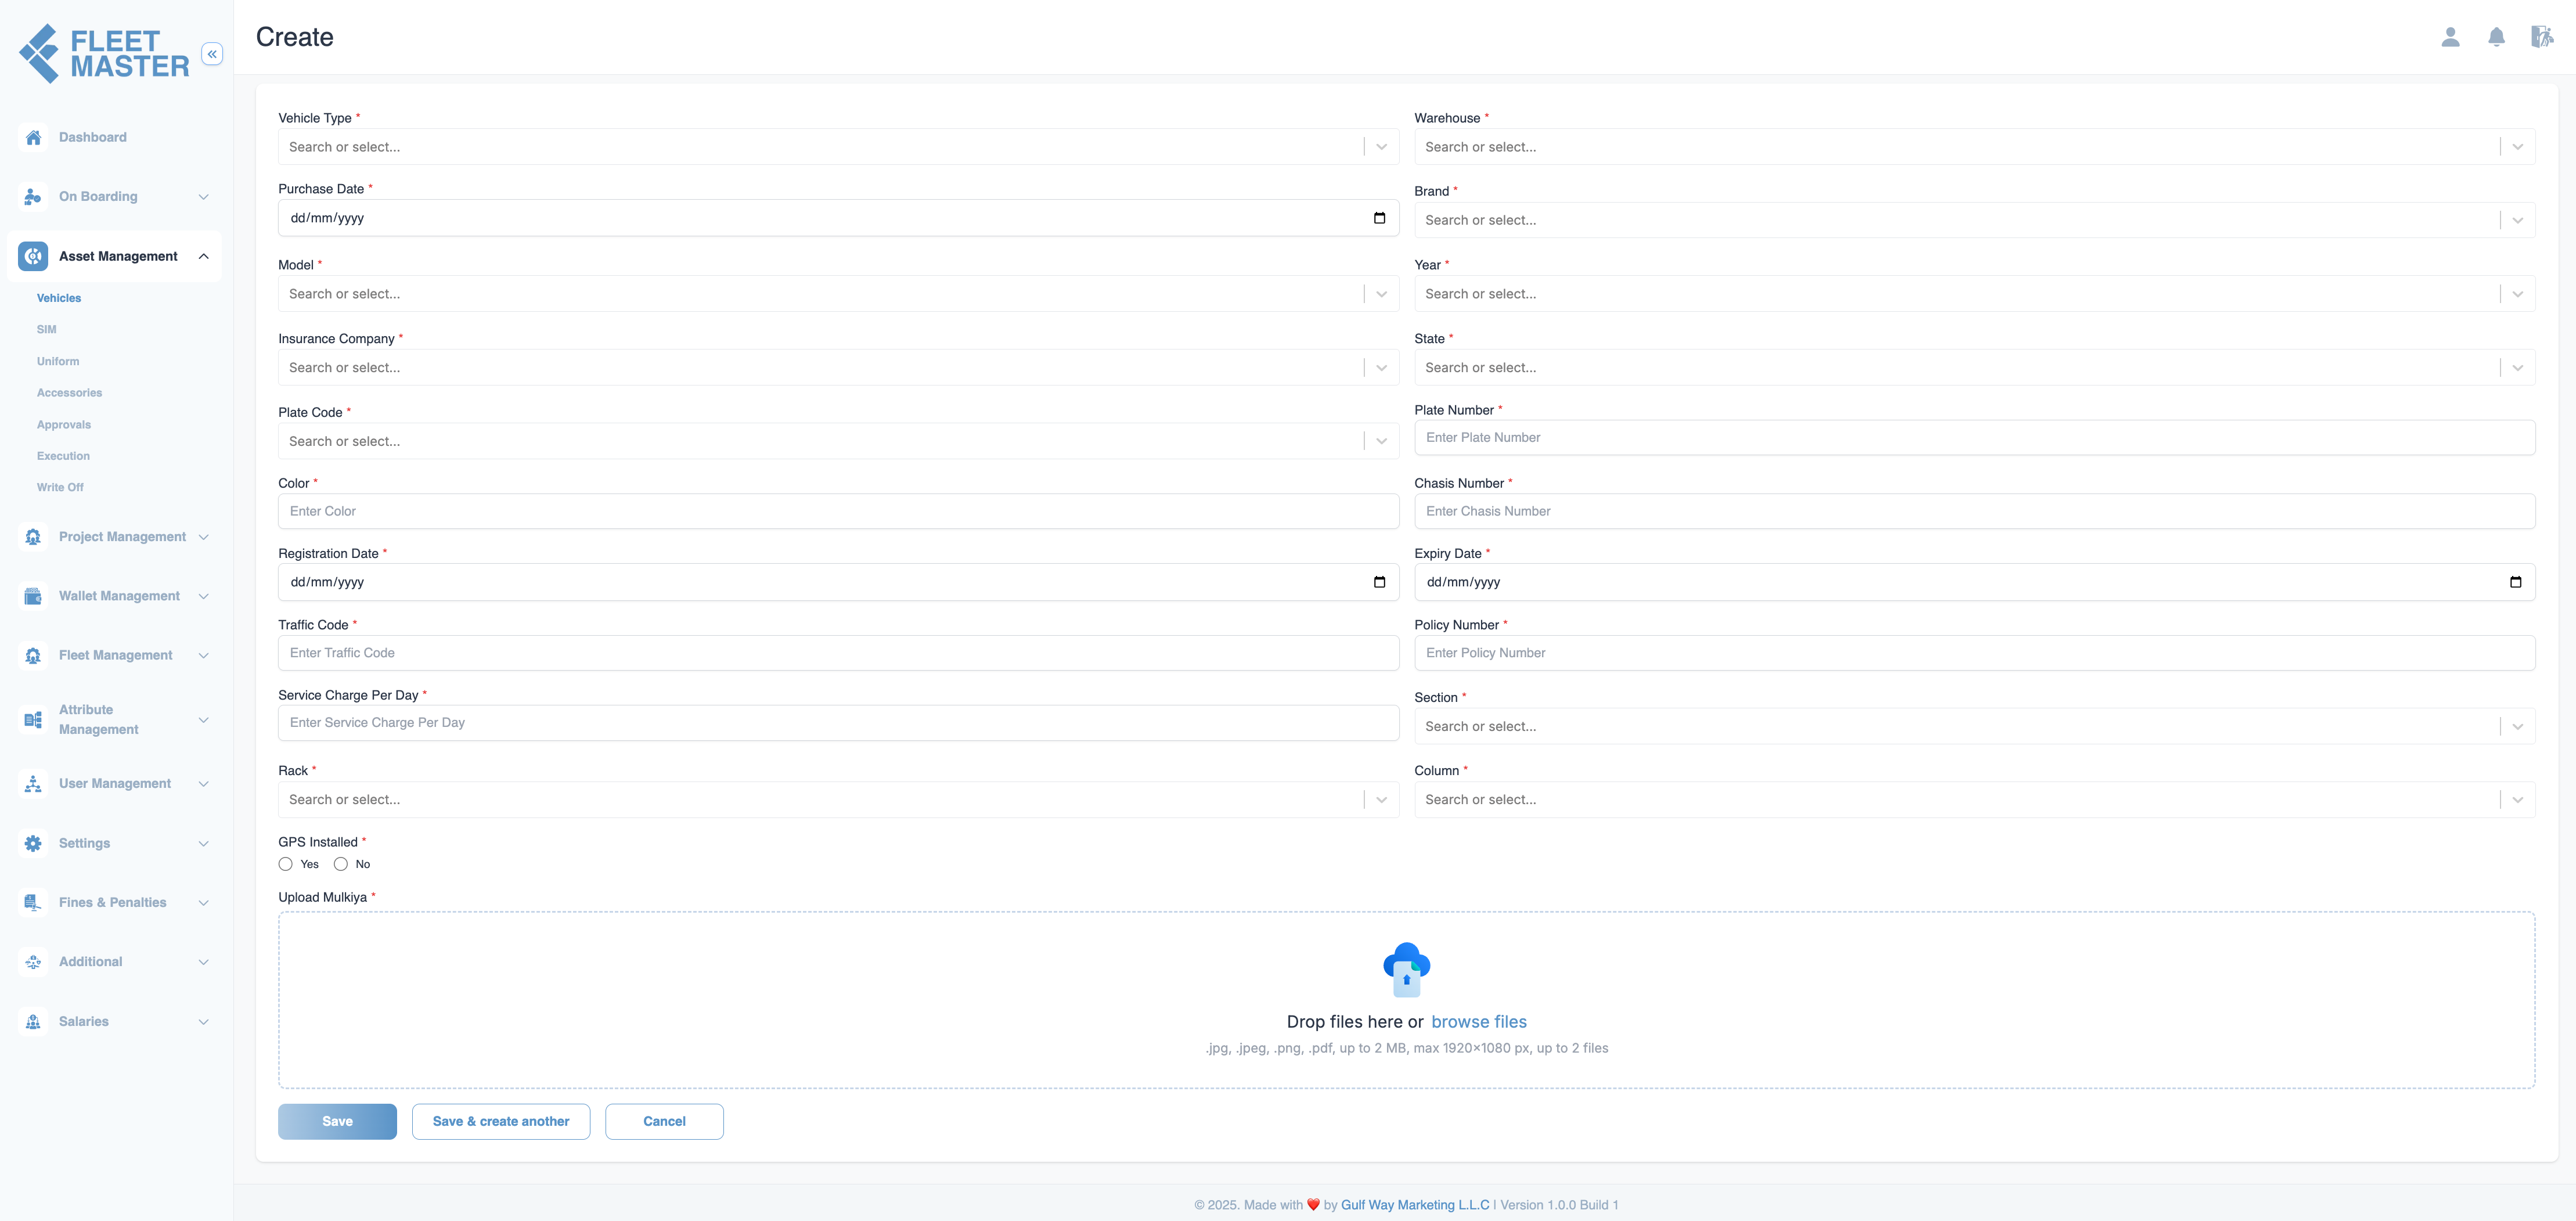
Vehicle Creation
Register new vehicle assets in Fleet Master by entering essential details like purchase info, insurance, GPS, and storage mapping. This forms the base for all lifecycle tracking and assignments.

Overview
In Fleet Master, all vehicles must be registered before they can be assigned, tracked, or moved through lifecycle statuses. This registration process, done via the Create Vehicle form, ensures every vehicle is fully documented with critical attributes, including insurance, storage location, GPS status, and legal documents.
Each vehicle becomes a trackable asset upon creation, allowing for seamless assignment, maintenance, transfers, and write-offs later in its lifecycle.
How to Create a Vehicle
Click Add Vehicle in the Vehicles section to open the form. Enter the following information:
Vehicle Information
| Field | Description |
|---|---|
| Vehicle Type | Choose from predefined types (Car, Bus, Bike, etc.). (Required) |
| Purchase Date | Date the vehicle was procured. (Required) |
| Brand / Model / Year | Enter the manufacturer, model, and year (e.g., Toyota Hiace 2022). (Required) |
| Plate Number | Official plate number. (Required) |
| State / Traffic Code | Issuing Emirate and traffic file code. (Required) |
| Chassis Number | Vehicle Identification Number (VIN). (Required) |
| Color | Primary color of the vehicle. (Required) |
Registration & Insurance Details
| Field | Description |
|---|---|
| Registration Date | Date when vehicle was registered. (Required) |
| Insurance Company | Select from the list of registered insurance providers. (Required) |
| Policy Number | Insurance policy reference. (Required) |
| Expiry Date | Insurance expiry date. (Required) |
Storage Location (Warehouse Mapping)
Fleet Master supports rack-based storage for vehicle assets.
| Field | Description |
|---|---|
| Warehouse | Select the storage location or depot. (Required) |
| Rack | Choose the rack within the warehouse. (Required) |
| Section | Define the section of the rack. (Required) |
| Column | Final column position of the asset. (Required) |
Tip:
Set up warehouse, racks, sections, and columns under Attribute Management before onboarding vehicles.
Operational Fields
| Field | Description |
|---|---|
| GPS Installed | Mark Yes if a GPS tracker is installed. |
| Service Charge / Day | Enter cost for daily usage if applicable. |
Document Upload
Upload scanned documents in .jpg, .png, or .pdf format (max 2MB each):
| Document | Purpose |
|---|---|
| Mulkiya | Official ownership certificate issued by UAE RTA. (Required) |
Note:
Upload only clear scans for compliance and approval workflows.
Required Setup Before Vehicle Creation
Make sure the following configurations exist before you start adding vehicles:
Field Validations
- All required fields must be completed to save the record.
- Chassis and plate number must be unique.
- GPS, service charge, and document upload are optional but highly recommended for operational accuracy.
Post-Creation Actions
Once the vehicle is registered:
- Status is automatically set to Waiting.
- Admins can validate and move the vehicle to Standby once all checks are complete.
- Vehicle can then follow its lifecycle: Ready to Allocate → Assigned → Approved → Executed, etc.
Best Practices
- Keep naming conventions consistent across all vehicle types and brands.
- Use the same casing and format for plate numbers and chassis numbers.
- Ensure warehouse, rack, and section mappings are preconfigured to prevent incomplete entries.
Asset Structure
Organize physical storage using warehouse, rack, section, and column settings.
Configuration
Manage categories like Car, Truck, Bus used during registration.
Compliance
Maintain and assign valid insurance providers with policy tracking.